15 Ways to Organize Dishes, Cups and Glasses Without Cabinets
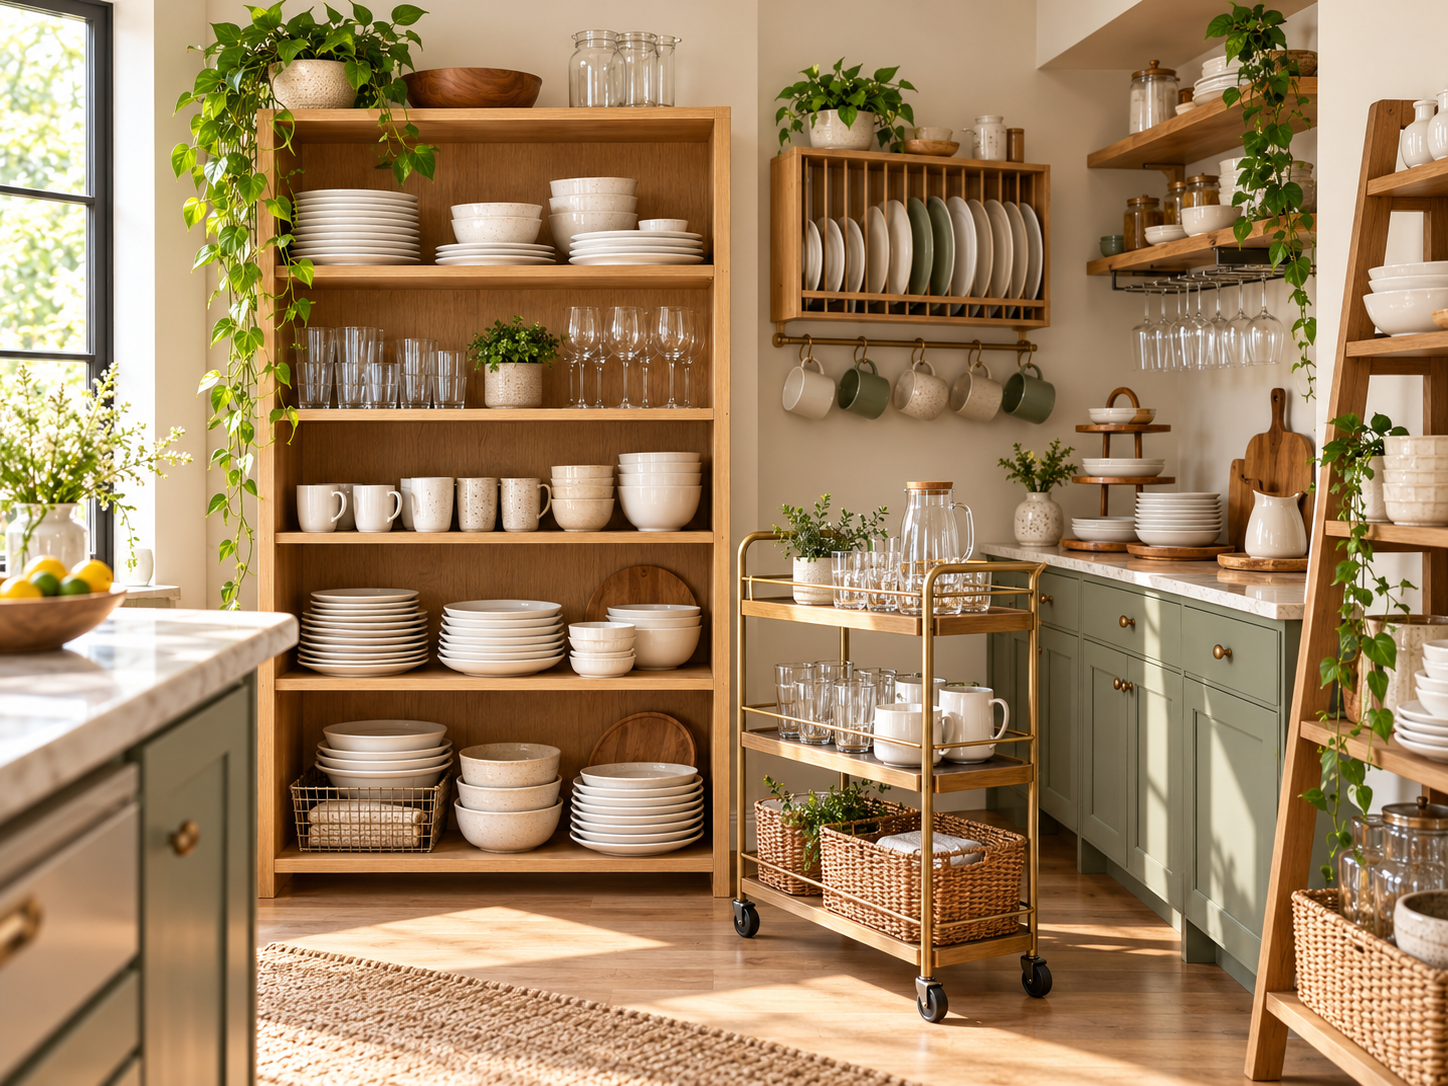
A kitchen with no cabinets does not mean your dishes and glasses have to live in a pile on the counter. It just means the storage has to come from somewhere other than a built-in box on the wall, whether that is open shelving, a piece of furniture you bring in yourself or a smart use of space you have been walking past every day.
This list walks through fifteen ways to organize dishes without cabinets, from wall-mounted options you can install in an afternoon to freestanding furniture that needs no tools at all. Every idea here works for renters, shared kitchens and tight budgets, and each one notes what to look for so you can pick the option that actually fits your space.
Quick Look: Dish Storage Without Cabinets
| Category | Covers Ideas | Best For |
|---|---|---|
| Wall & Shelf Solutions | Open shelves, plate rack, corner shelf, sink shelf | Kitchens with open wall space |
| Hanging & Vertical Racks | Stemware rack, mug hooks, pegboard | Adding storage without new furniture |
| Rolling & Mobile Storage | Bar cart, rolling kitchen cart | No drilling allowed or shared kitchens |
| Furniture Pieces | Hutch, armoire, sideboard, credenza | Renters who want to bring storage with them |
| Display & Tiered Storage | Wire baskets, tiered stand, ladder shelf | Small counters or no wall space to spare |
1. Open Wall Shelves for Everyday Dishes

Open shelving is usually the first swap people make when there is no cabinet to hide dishes in, and it works because it turns storage into the decor instead of fighting it. A few sturdy wooden or metal shelves mounted at a comfortable reach height can hold the plates, bowls and glasses you use every day, right where you need them near the sink or stove.
Keep the look tidy by grouping like with like: plates in one stack, bowls in another, glasses upright in a row. Anything chipped or mismatched is better off in a lower, less visible shelf or a bin out of sight.
Look for: solid wall anchors rated for the shelf’s full loaded weight, not just the shelf’s own weight.
Space-Saving Tip: Mount shelves 2 to 3 inches apart in height so stacked plates do not wobble, and leave an open top shelf for glasses so they’re visible and easy to grab one-handed.
At a Glance
2. A Wall-Mounted Plate Rack
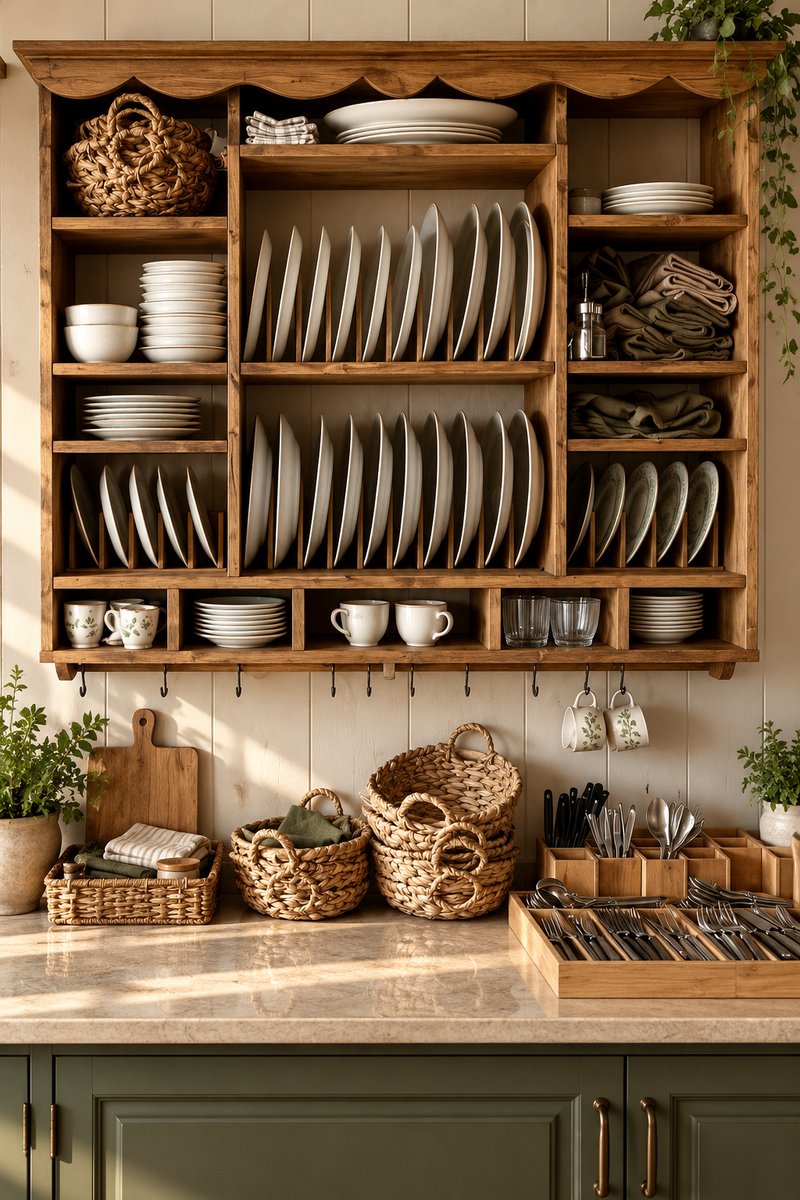
A plate rack is basically a drying rack that lives on the wall permanently, and it solves two problems at once: nowhere to stack plates, and nowhere to let them air dry after washing. Plates sit upright in individual slots instead of stacked flat, which also makes it easier to grab exactly the plate you want without lifting a whole stack.
This idea pairs well with other no-cabinet storage because it keeps plates off the counter entirely. If you are furnishing a small kitchen from scratch, it is worth reading through a broader list of renter-friendly storage ideas that protect your security deposit before you start drilling anything, since several of those same anchor and adhesive rules apply here too.
Look for: a rack with slots sized for your actual plate thickness, since thin melamine and heavy stoneware need different spacing.
Space-Saving Tip: Install the rack directly above or beside the sink so dripping plates do not leave water marks on the floor or counter below.
Before You Mount It
- Confirm the wall type (drywall, plaster, tile) before choosing anchors
- Check your lease for drilling restrictions first
- Leave slack room for your largest dinner plate
- Plan the height so water can drip into the sink below
3. A Rolling Bar Cart for Glassware
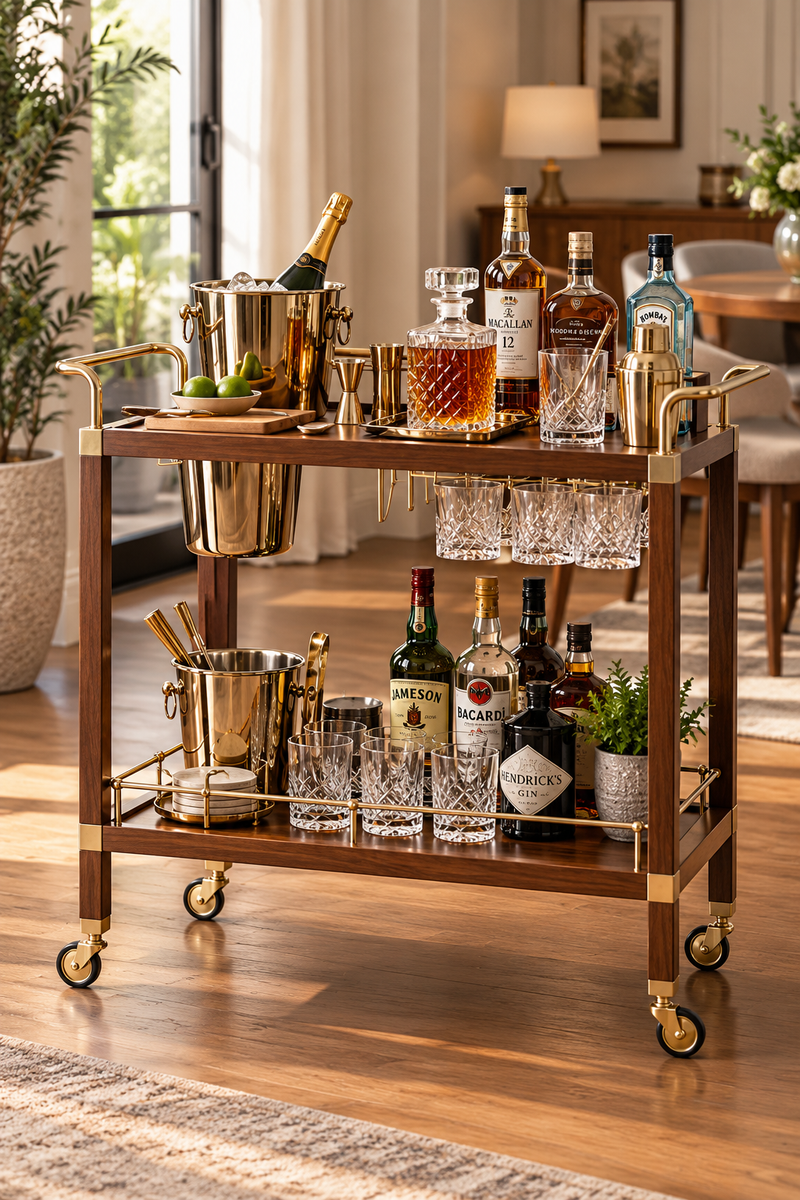
A narrow rolling cart gives glassware a dedicated home without needing any wall space or tools at all. Because it moves, it can tuck into a corner during the week and roll next to the table when you are entertaining, which makes it a flexible option for a kitchen with no cabinet and no extra floor space to spare.
Two or three tiers is usually enough: one for everyday glasses, one for mugs, and a bottom shelf for pitchers or things you reach for less often.
Look for: a cart with a lip or raised edge on each tier so glasses do not slide off when the cart is moved.
Space-Saving Tip: Pick a cart narrow enough to fit through doorways fully loaded, so you can actually move it between the kitchen and dining area.
4. An Under-Shelf Stemware Rack
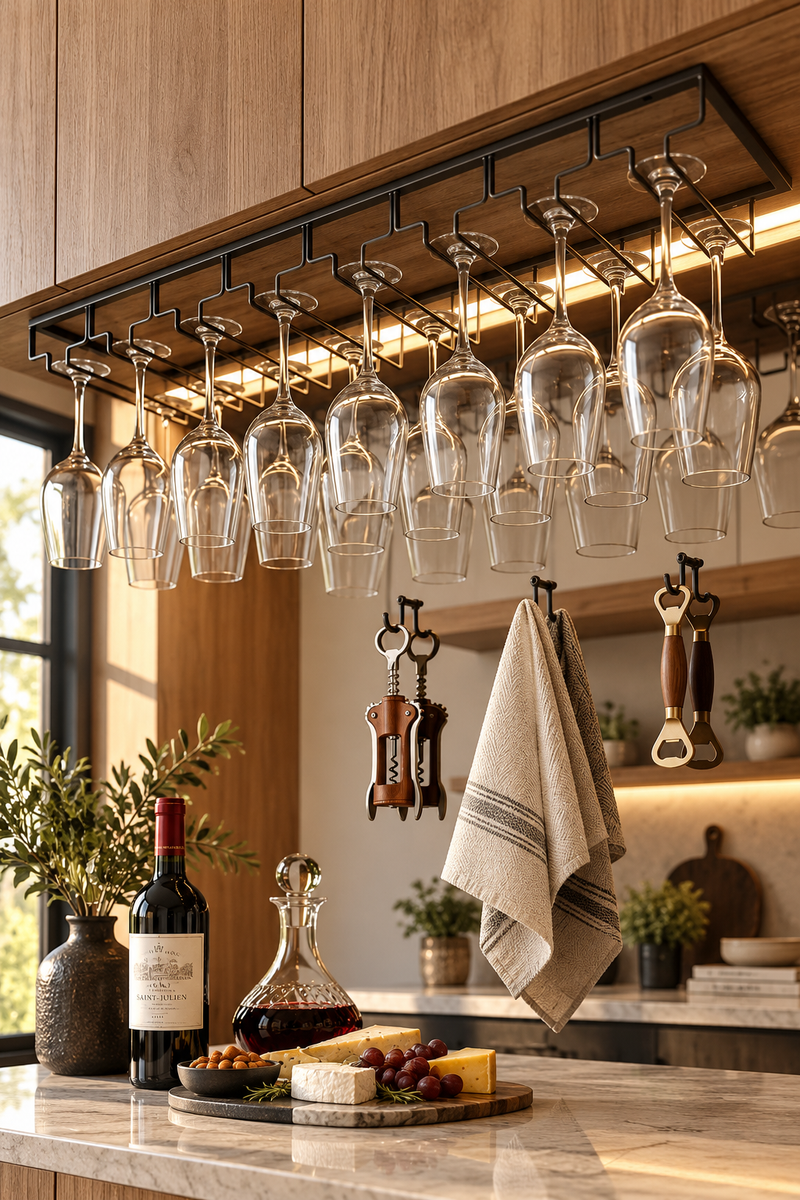
If you already have one open shelf or a shelf under a cart, an under-shelf stemware rack clips on and hangs wine glasses upside down underneath it, using space that would otherwise sit empty. It is one of the few storage upgrades that adds capacity without taking up any new footprint.
These racks typically clamp or screw into the underside of a shelf, so check the shelf material first; a thin laminate shelf may not hold screws well.
Look for: a rack rated for the number of glasses you actually own, since cheaper racks sag under a full load.
Space-Saving Tip: Leave at least two inches of clearance below the hanging glasses so they do not bump the counter or shelf below.
Mounting Style Compared
| Style | Pro | Trade-off |
|---|---|---|
| Clamp-on | No holes, renter friendly | Slightly less secure |
| Screw-in | Most stable | Needs drilling permission |
5. A Vintage Hutch or Armoire
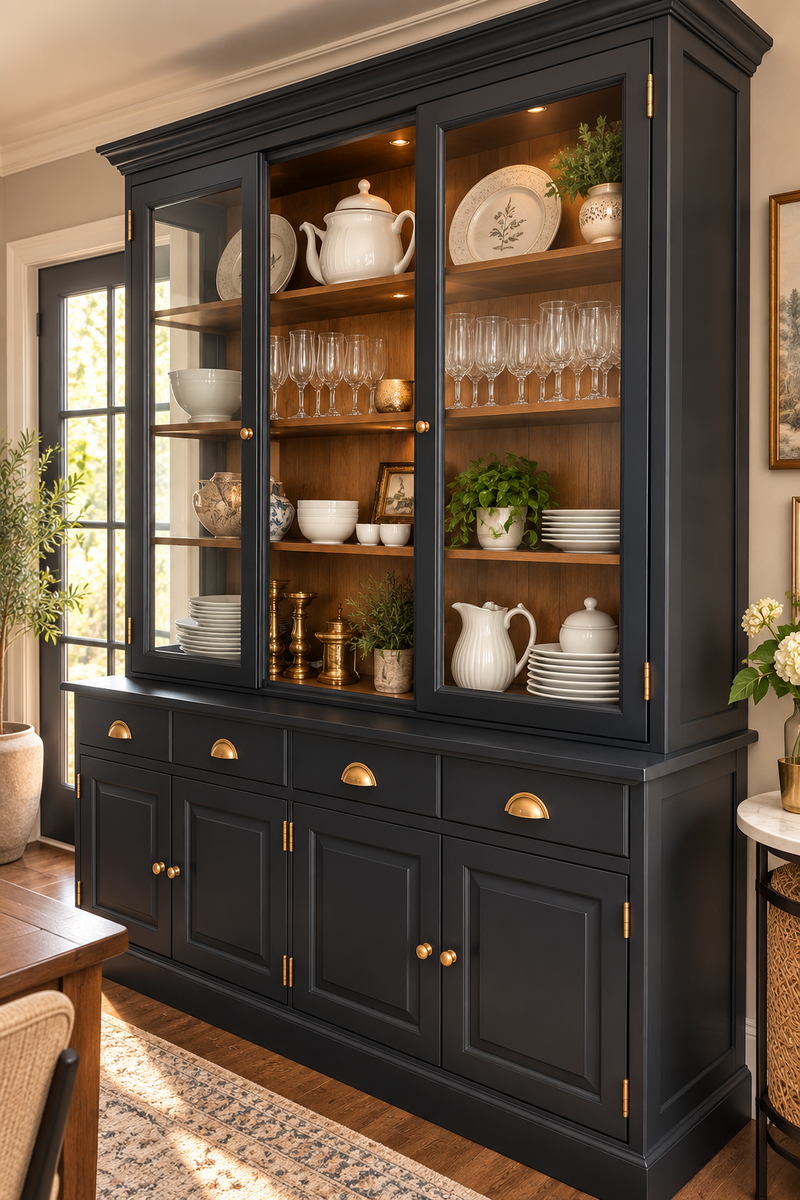
A freestanding hutch or armoire acts like a cabinet you bring with you instead of one built into the wall, which makes it a strong option for renters or anyone without built-in storage. Glass-front doors keep dust off while still letting your dishes double as display, and the drawers below can hold linens or serving pieces.
Because it is furniture rather than a fixture, a hutch also travels with you if you move, which is not something a built-in cabinet can do.
Look for: a hutch with adjustable interior shelves, so you can resize the gaps to fit stacks of plates or bowls as your collection changes.
Space-Saving Tip: Place the hutch against the one wall with the most floor depth to spare, since even a slim hutch needs 14 to 18 inches of clearance.
A hutch or armoire turns your kitchen storage into a piece of furniture you actually own and can take with you.
6. A Floating Corner Shelf
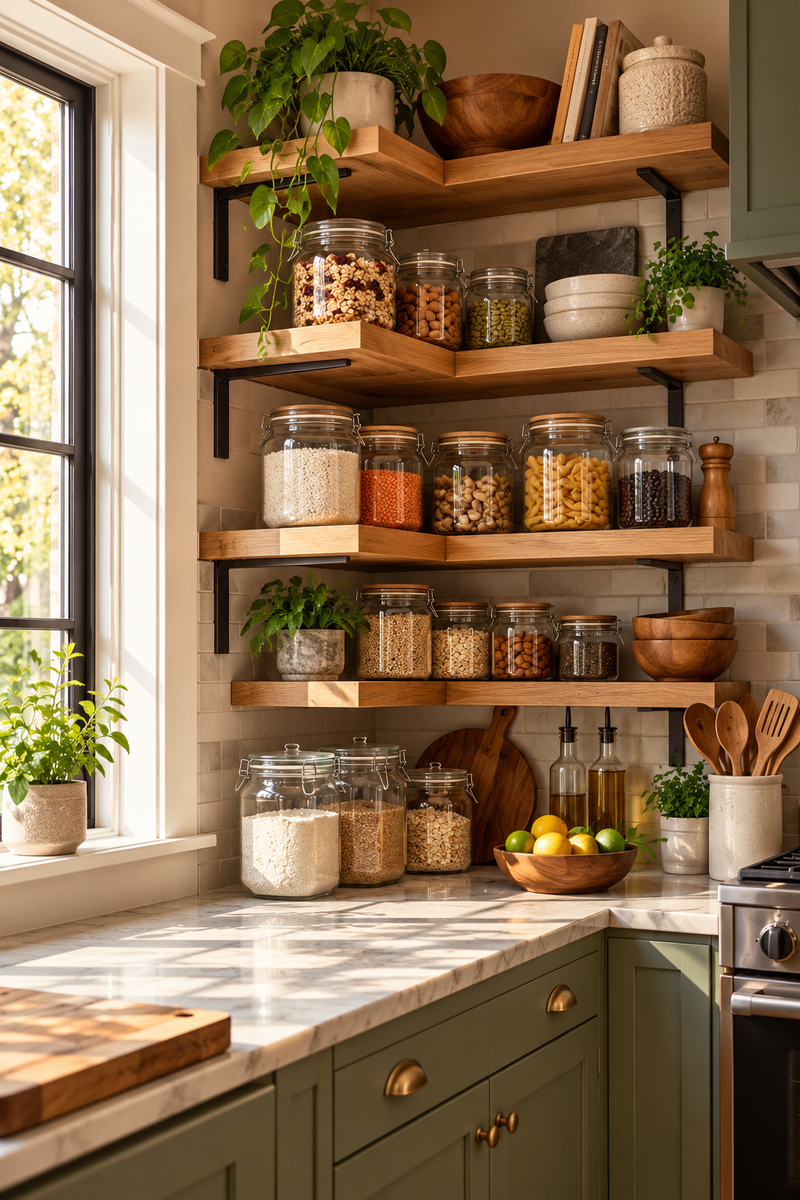
Corners are some of the most overlooked space in a kitchen with no cabinets. A floating corner shelf fits into that dead zone and gives you a spot for bowls, mugs or a small stack of plates without eating into usable counter or walking space.
Because the shelf has no visible brackets, it also keeps the kitchen looking open rather than cluttered, which matters more in a small space where every added object is visible.
Look for: a floating shelf bracket rated for at least twice the weight you plan to store, since corner mounts carry more stress than a flat wall shelf.
Space-Saving Tip: Use the corner shelf for lighter, less-used pieces like serving bowls, since corner mounts generally hold less weight than a full-length wall shelf.
Good to Know
Corner shelves rely entirely on the strength of the mounting bracket inside the wall, so this is one spot where it is worth spending a little more on quality hardware.
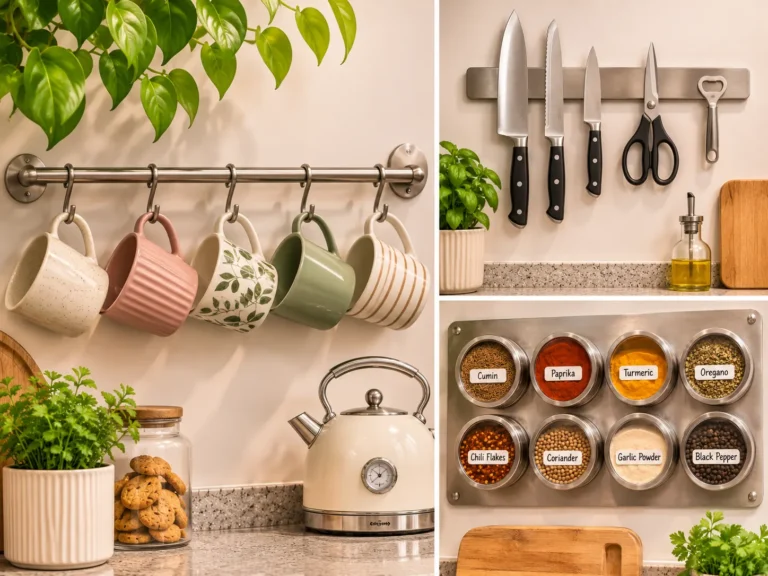
7. Wall Hooks or a Pegboard for Mugs
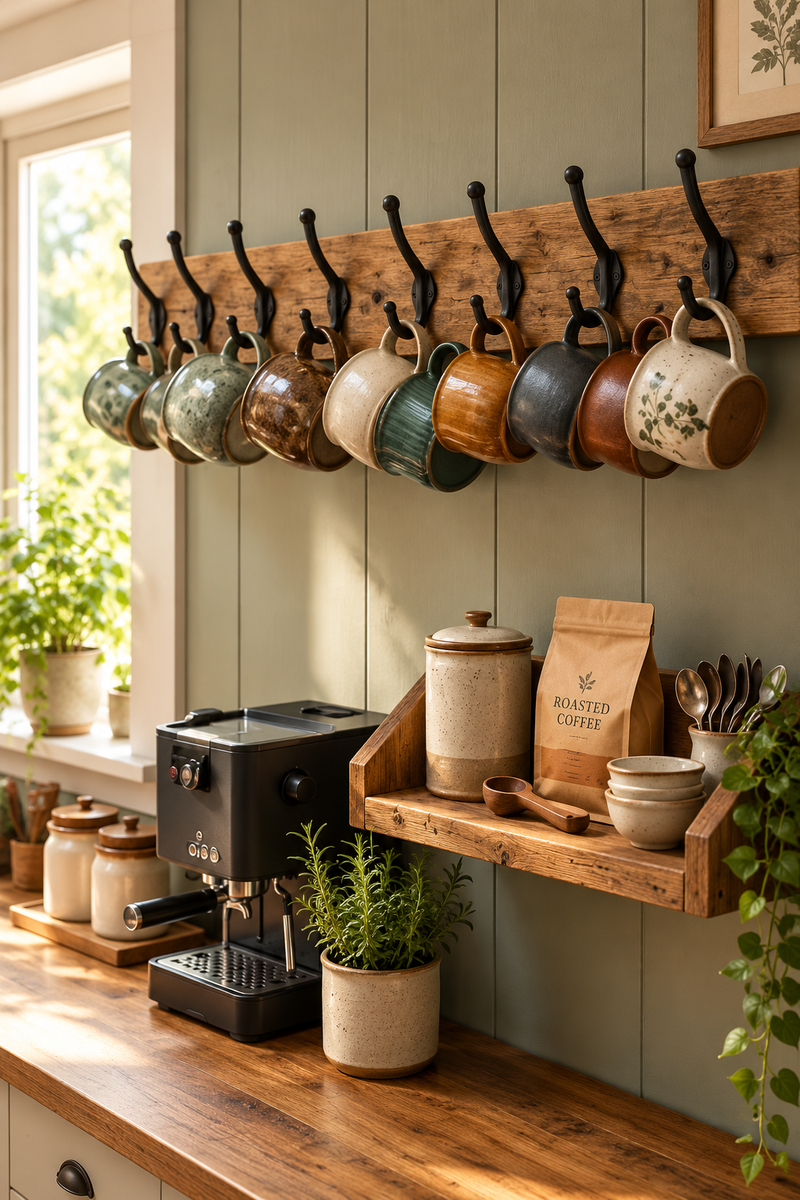
Mugs are one of the easiest categories to get off a shelf and onto the wall. A row of hooks, or a pegboard with moveable hooks, keeps mugs hanging by their handles so they take up almost no shelf depth and stay easy to grab with one hand.
A pegboard has the added benefit of being reconfigurable: you can rearrange the hooks as your mug collection grows or shrinks, or add a hook for a small utensil holder nearby.
Look for: hooks with a closed, rounded end rather than a sharp open hook, so mugs do not slip off when bumped.
Space-Saving Tip: Space hooks at least 4 inches apart so mug handles do not knock into each other when you grab one.
Before
Mugs crowding a single shelf, stacked three high and hard to reach
After
Mugs hanging in a single row on hooks, each one visible and easy to grab
8. Stacked Wire Baskets on Open Shelving
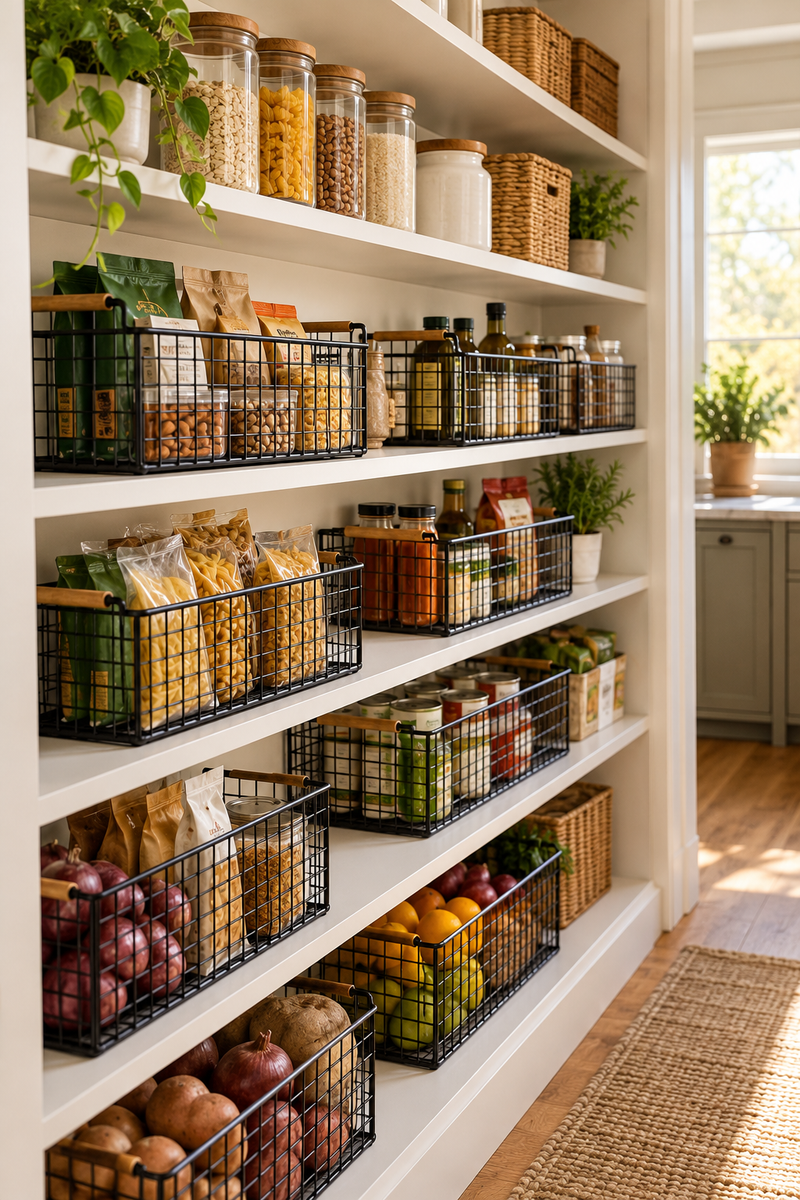
Wire baskets add a second layer of organization on top of open shelving, grouping smaller or oddly shaped items, think saucers, lids, or extra glasses, into one contained spot instead of letting them spread across the whole shelf. Stacking two or three baskets also makes use of vertical space that would otherwise sit half empty above a short stack of plates.
Because the baskets are see-through, you can still tell what is inside at a glance, which matters when shelf space is tight and you do not want to dig.
Look for: baskets with a flat, stable base that will not tip when pulled partway off the shelf.
Space-Saving Tip: Label each basket with a small tag so everyone in the household puts things back in the right spot.
Setting Up Stacked Baskets
Quick Comparison: Ideas 1 to 8
Ideas 1 to 8 Compared
| Idea | Space Needed | Cost Level | Best Use |
|---|---|---|---|
| Open Wall Shelves | Wall space | Low to mid | Everyday dishes |
| Wall-Mounted Plate Rack | Small wall space | Low | Plates that air-dry |
| Rolling Bar Cart | Floor space, narrow | Mid | Glassware & stemware |
| Under-Shelf Stemware Rack | Under existing shelf | Low | Wine glasses |
| Vintage Hutch or Armoire | Floor space, wide | Mid to high | Full dish sets |
| Floating Corner Shelf | Unused corner | Low to mid | Bowls, mugs |
| Wall Hooks or Pegboard | Small wall space | Low | Mugs |
| Stacked Wire Baskets | Existing shelf | Low | Lids, saucers, extras |
9. A Narrow Bookshelf as a Dish Pantry
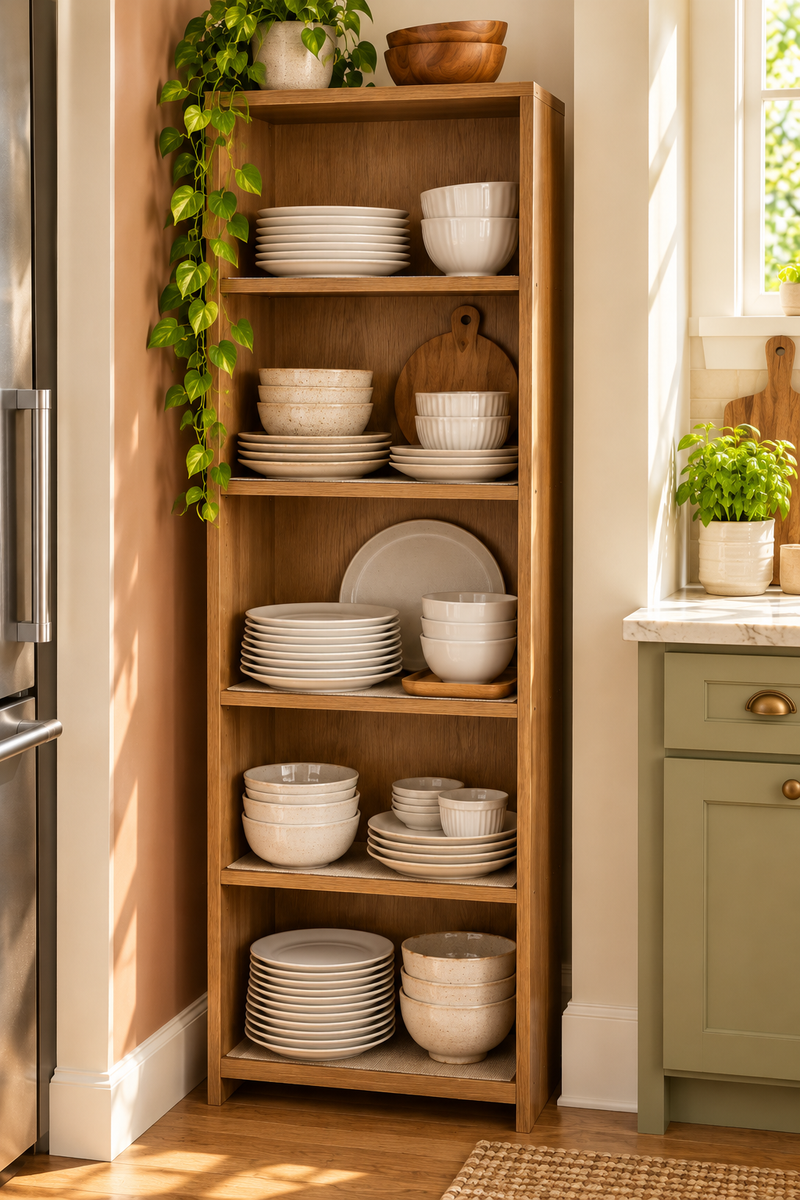
A slim bookshelf, the kind usually meant for a hallway or bedroom, can double as a dish pantry when floor space is at a premium. Its narrow depth is actually an advantage here: it holds plates and bowls without letting things get buried two or three rows deep the way a wide cabinet does.
This works especially well in a kitchen with an awkward empty wall, since a bookshelf is easy to find in a size that fits almost any gap.
Look for: a bookshelf with shelves deep enough for your dinner plates, usually at least 10 to 11 inches.
Space-Saving Tip: Add a shelf liner or thin rubber mat to each shelf so stacked plates do not slide or chip when the shelf is bumped.
Do
- Anchor the bookshelf to the wall, especially if there are kids or pets
- Use the bottom shelf for your heaviest items
Skip
- Overload the top shelf with heavy stacks
- Push the shelf against an uneven wall where it can rock
10. A Shelf Over the Sink
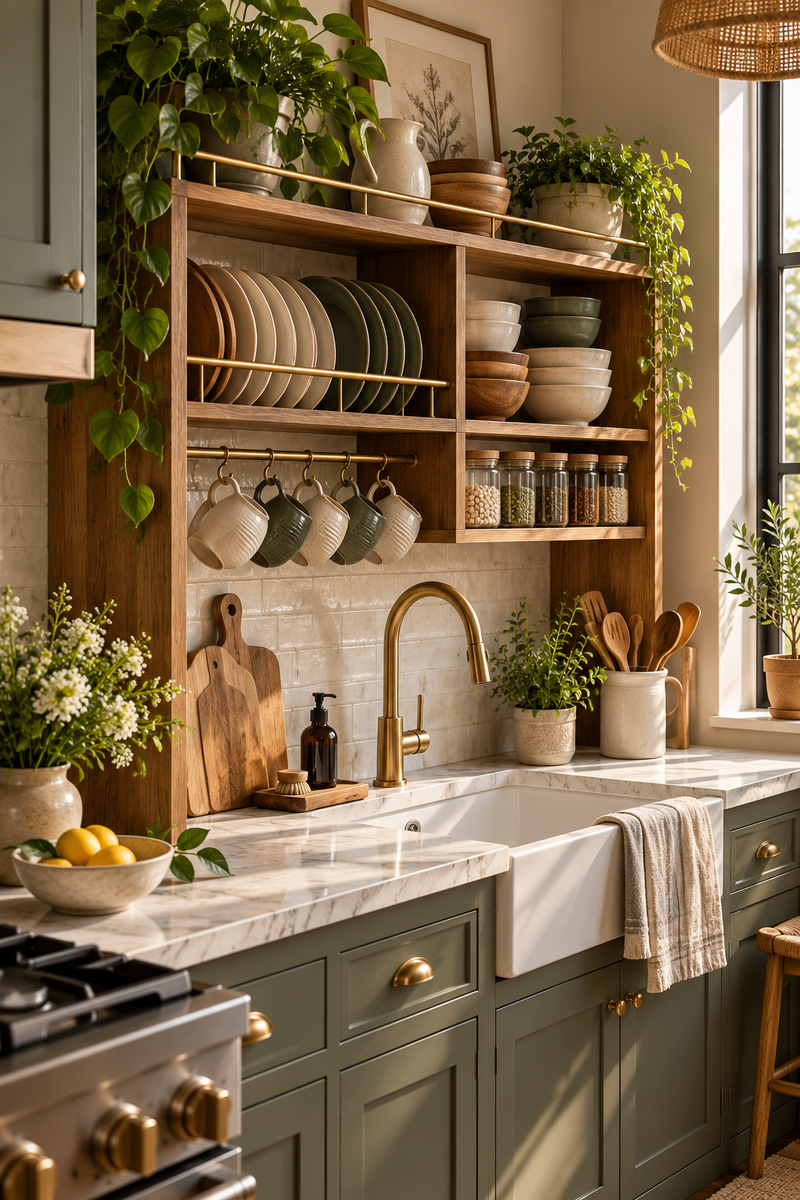
The wall above a sink is often left completely empty, even though it is some of the most convenient storage space in the whole kitchen. A single shelf mounted there puts glasses and everyday dishes within arm’s reach of where you wash and dry them.
Keep this shelf light on load and shallow in depth, since it sits close to your head height and a deep, heavy shelf can feel cramped over a sink.
Look for: a shallow shelf, around 6 to 8 inches deep, so it does not block the window or feel like it is closing in on the sink area.
Space-Saving Tip: Mount the shelf high enough that tall glasses and pitchers clear the faucet and window trim below.
Why This Spot Works
- Puts glasses right next to where they get washed
- Uses wall space that is otherwise empty
- Keeps the counter below clear for drying dishes
- Works even above a window with the right bracket depth
11. A Tiered Stand for Bowls
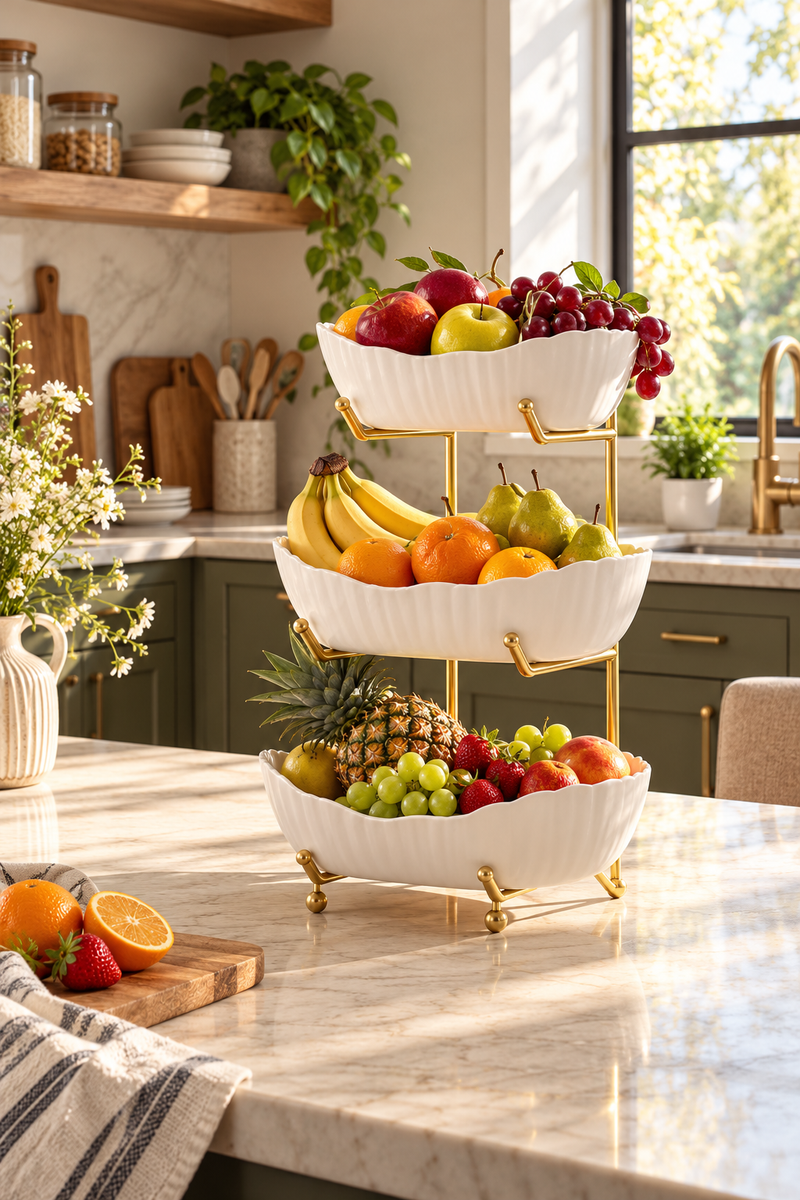
A tiered stand, similar to what you might use for fruit, works just as well for bowls. Stacking bowls by size on each tier keeps them from nesting into one tall, wobbly column and makes the smaller bowls on top easy to grab without unstacking the whole set.
Because it sits on the counter rather than the wall, this is a good option if drilling is not allowed at all, or if you want flexible storage you can move between the counter and a table.
Look for: a stand with sturdy, widely spaced legs so it will not tip when you lift a bowl from a middle tier.
Space-Saving Tip: Put your most-used bowl size on the tier closest to counter height so you are not reaching up or bending down for daily use.
At a Glance
12. A Mug Rack Under a Shelf with Hooks
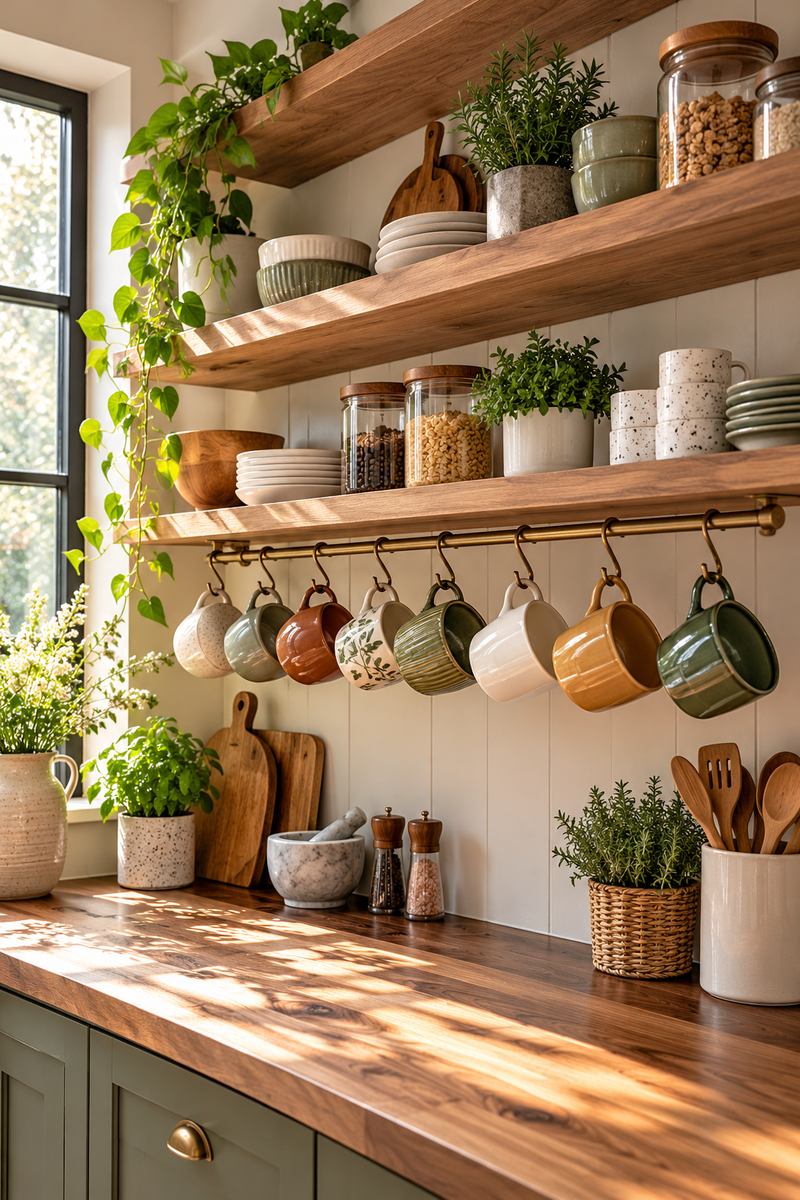
Instead of a separate wall-mounted rack, hooks can be screwed directly into the underside of an existing shelf, letting mugs hang in the space between that shelf and the counter below. This stacks two kinds of storage into one footprint, dishes on top of the shelf and mugs underneath it.
It is a small detail, but it is one of the easiest ways to add storage without adding anything new to the wall.
Look for: short hooks that screw in flush, so they do not stick out far enough to snag a sleeve when you reach past them.
Space-Saving Tip: Leave enough clearance between the hooks and the counter below so your tallest mug still hangs freely.
Good to Know
This only works on a shelf thick enough to hold a screw securely, so thin particleboard shelves are usually not a good candidate.
13. A Ladder Shelf for Dishes
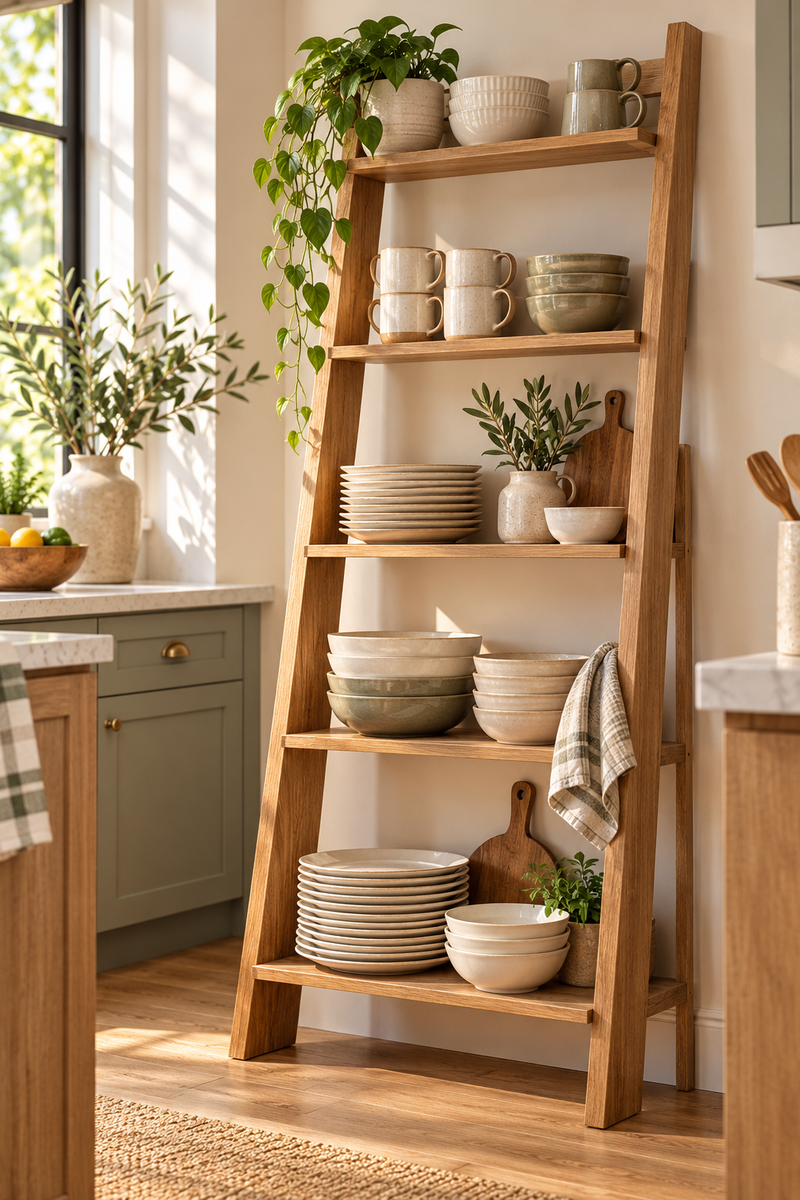
A ladder shelf leans against the wall rather than mounting into it, which makes it one of the few vertical storage options that needs no drilling at all. Each rung can hold a stack of plates, a row of bowls, or a scattering of mugs, and the open-back design keeps the whole thing feeling light rather than bulky.
Because it leans rather than stands free, make sure it is braced against a flat wall and not on an uneven or sloped surface.
Look for: a ladder shelf with a wide base and a slight backward lean built in, which keeps it stable without any wall anchor.
Space-Saving Tip: Keep the heaviest dishes on the bottom rung, since a top-heavy ladder shelf is more likely to shift over time.
14. A Rolling Kitchen Cart with Shelving
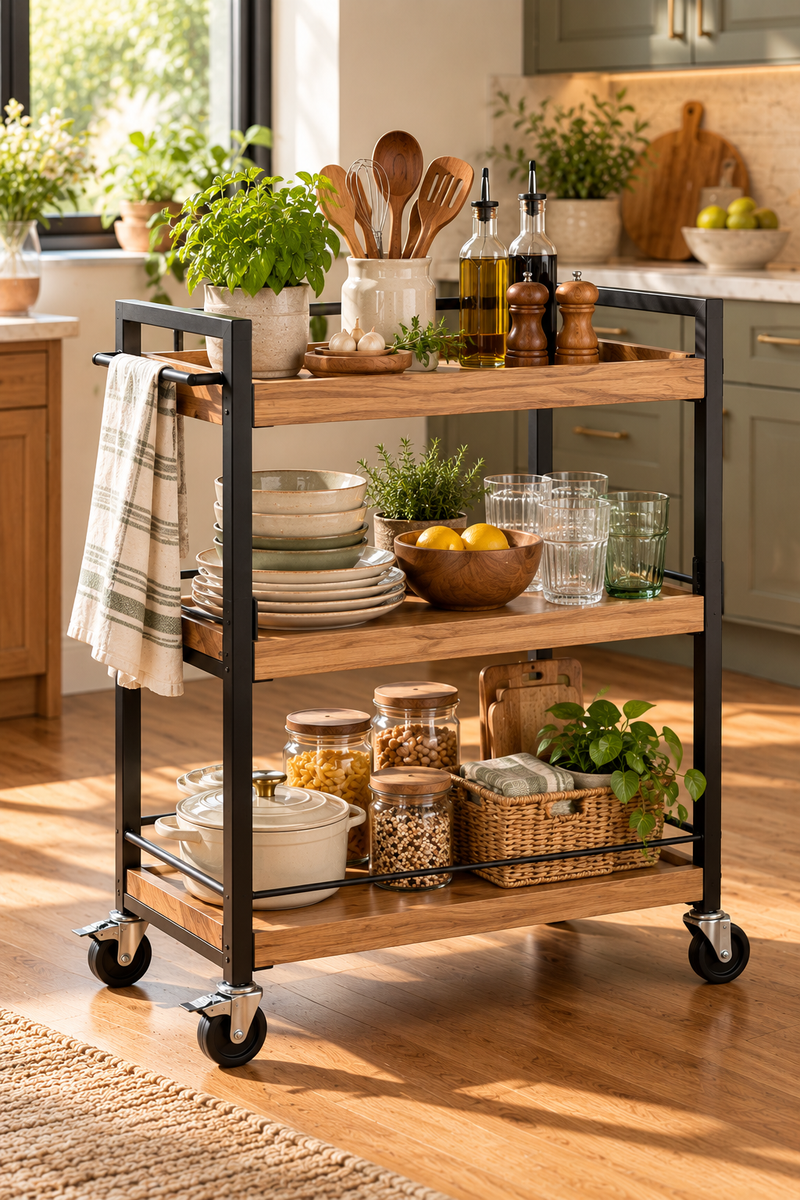
A rolling cart with two or three open shelves can act as a stand-in pantry for dishes, pots, or anything else that has no cabinet to live in. Its wheels mean it can be tucked against a wall most of the time, then pulled out for easy access when you are cooking or unloading the dishwasher.
This is especially useful in a shared kitchen, since a cart gives one person a dedicated storage zone that is clearly theirs without needing to claim wall space.
Look for: locking caster wheels, so the cart stays put once you have it positioned where you want it.
Space-Saving Tip: Measure the narrowest doorway or hallway the cart needs to pass through before buying, fully loaded carts do not squeeze through gaps.
Cart Width Compared
| Width | Pro | Trade-off |
|---|---|---|
| Narrow (under 16 in) | Fits tight gaps | Holds less per shelf |
| Standard (18 to 24 in) | More storage per shelf | Needs more floor space |
15. A Sideboard or Credenza
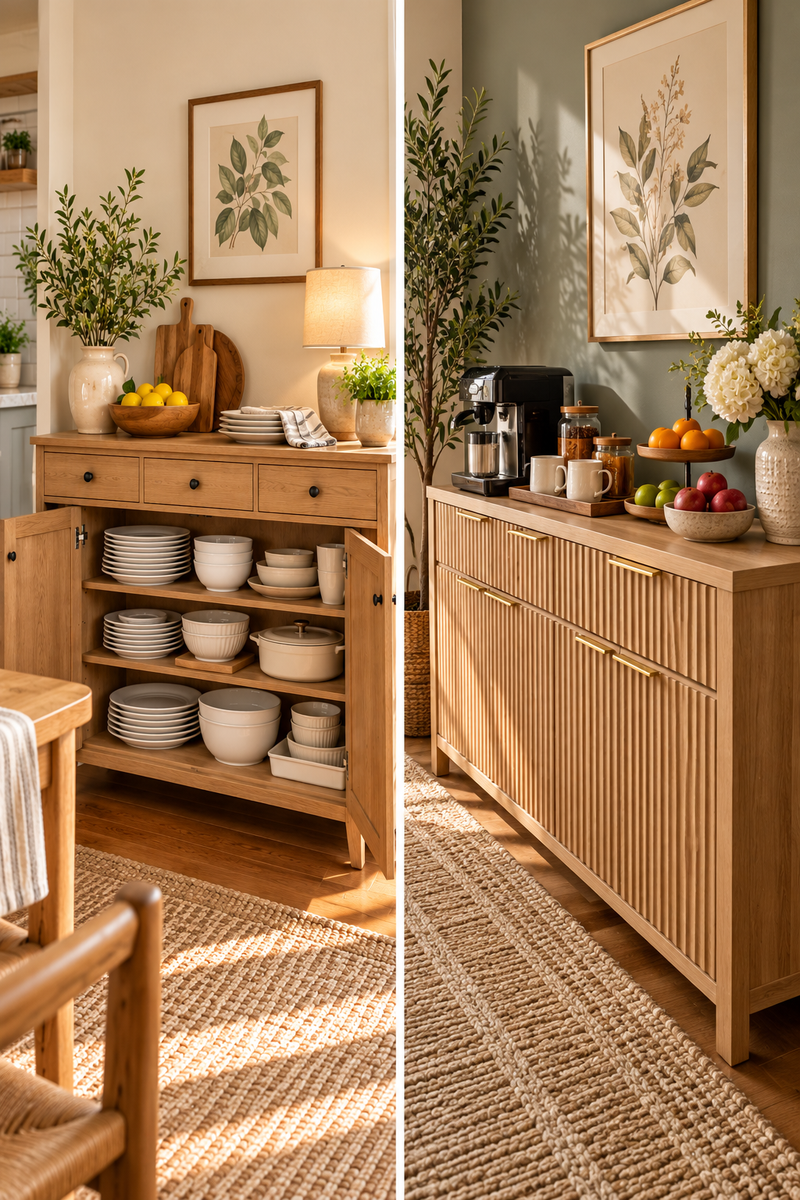
A sideboard or credenza brings enclosed storage back into the room without needing a built-in cabinet. Its closed doors hide stacks of dishes that do not need to be on display, while the flat top doubles as extra counter or serving space, something a kitchen with no cabinets is often short on.
Because it is a standalone piece, it also works well placed just outside the kitchen, in a dining area or hallway, if the kitchen itself has no spare wall.
Look for: a piece with adjustable interior shelves so you can stack dishes at a height that actually matches what you own.
Space-Saving Tip: Use the top surface as a small staging area for dishes waiting to be put away, so they never pile up on the main counter.
A sideboard gives you closed-door storage and extra counter space, without needing a single built-in cabinet.
Quick Comparison: Ideas 9 to 15
Ideas 9 to 15 Compared
| Idea | Space Needed | Cost Level | Best Use |
|---|---|---|---|
| Narrow Bookshelf | Wall space, slim | Low to mid | Plates & bowls |
| Shelf Over the Sink | Wall above sink | Low | Glasses near the sink |
| Tiered Stand | Counter space | Low | Nesting bowls |
| Mug Rack Under a Shelf | Under existing shelf | Low | Mugs |
| Ladder Shelf | Leans on wall | Low to mid | Light dish stacks |
| Rolling Kitchen Cart | Floor space | Mid | Stand-in pantry |
| Sideboard or Credenza | Floor space, wide | Mid to high | Hidden dish storage |
Quick Questions
Do I need to drill holes to organize dishes without cabinets?
No. Several ideas on this list, like a rolling cart, a ladder shelf, a tiered stand, or a hutch, need no drilling at all. If you do want a wall-mounted option, clamp-on or adhesive-backed hardware can work as long as it is rated for the weight you plan to store.
What is the most budget-friendly way to store dishes without cabinets?
Open wall shelves and a tiered countertop stand are usually the cheapest starting points, since both can be done with simple, inexpensive hardware or no hardware at all.
Is open shelving actually sturdy enough for everyday dishes?
Yes, as long as the brackets or anchors are rated for the full loaded weight of the shelf, not just the shelf itself. Always check the weight rating on the hardware and the wall type before mounting anything.
What should renters check before mounting anything to the wall?
Check your lease for any restrictions on drilling or wall anchors first, and confirm the wall type, since drywall, plaster, and tile all need different hardware. When in doubt, a freestanding or rolling option avoids the question entirely.
Final Thoughts
None of these ideas require a built-in cabinet, and most of them can be set up in an afternoon with tools you probably already have. Start with whichever option matches the wall space, floor space, or budget you actually have right now, and add a second idea later once you see what your kitchen still needs.
Save this list for the next time your dishes need a real home instead of a counter pile.
2 Comments