15 Winter Kitchen Organization Small Kitchen Ideas for Limited Storage
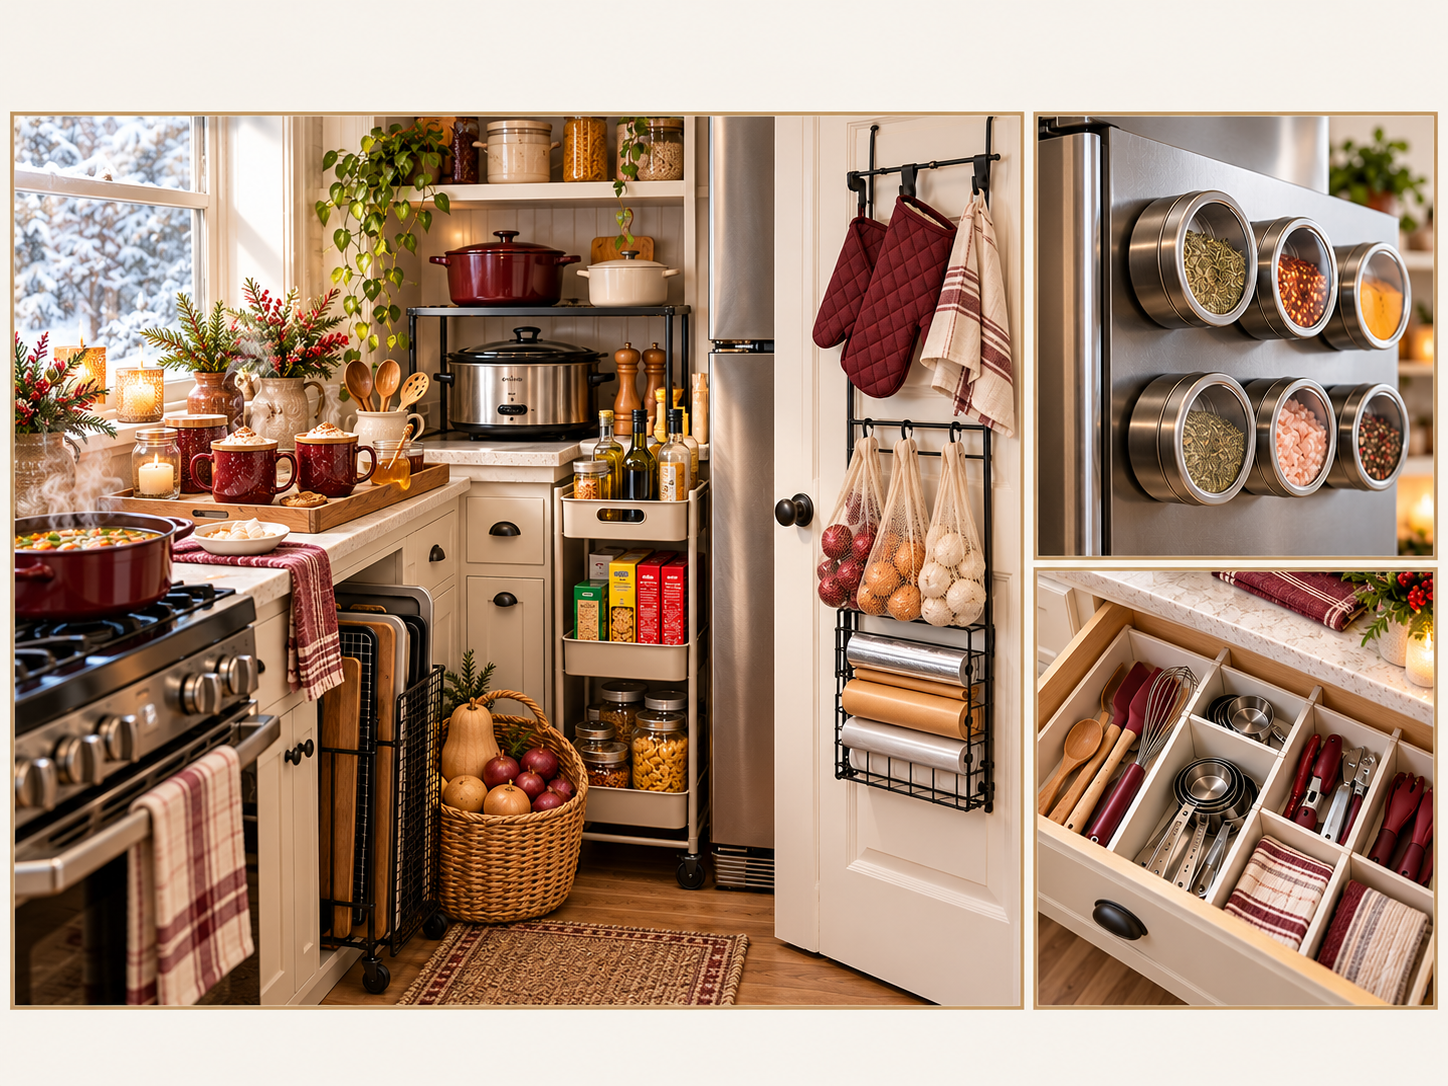
Winter asks more of a small kitchen than any other season. Slow cookers, soup pots, baking sheets and cocoa supplies all show up at once, and none of them arrive with extra cabinets.
Most advice says to buy a pantry or add shelving, which does not help when you rent, share the space, or simply have nowhere to put it. A winter kitchen organization small kitchen plan has to work with the walls, doors and gaps you already have.
These 15 ideas are built for limited storage and a tight budget. Each one moves a specific thing to a specific spot, so the cold months feel less crowded.
Most can be done in an afternoon, and several need no tools at all. Pick two or three to start, then add more as the season goes on.
Quick Look: What’s Inside
| Category | Covers Ideas | Best For |
|---|---|---|
| Seasonal Swaps and Labels | Ideas 1, 15 | Shared kitchens and tight shelves |
| Cold Weather Cookware | Ideas 2, 4, 13 | Slow cookers, pans and pot lids |
| Drinks and Pantry Stock | Ideas 3, 7, 10 | Cocoa, cans and bulk groceries |
| Door and Fridge Side Space | Ideas 6, 9, 14 | Renters who cannot drill |
| Containers and Baking | Ideas 5, 8 | Leftovers and holiday baking |
| Gaps and Drawers | Ideas 11, 12 | Awkward gaps and one lone drawer |
1. Move Summer-Only Gear Into One Lidded Bin
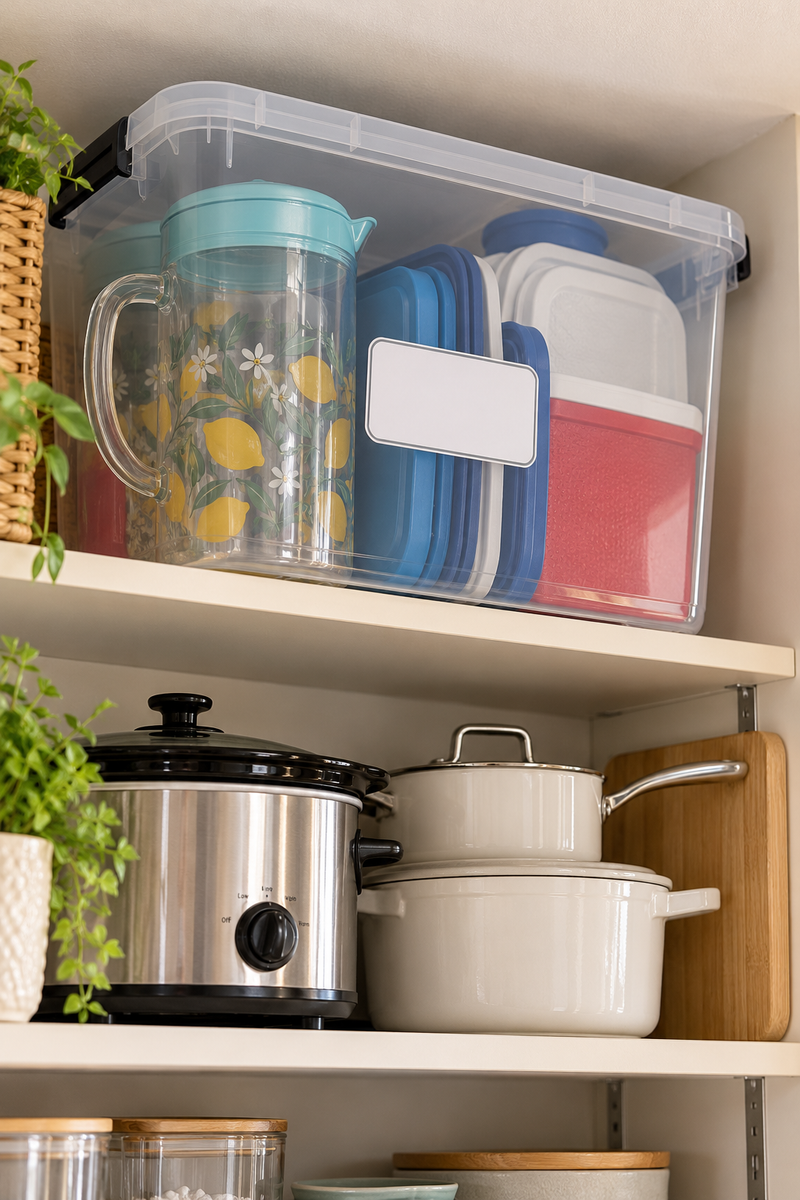
The ice cream scoop, the picnic pitcher and the cooler lids still hog prime shelf space in November. In a small kitchen, that is space the slow cooker needs.
Gather everything you will not touch until spring and give it one home: a stackable lidded bin with a flat top. Label the front so nobody opens it by mistake. Look for: a bin that fits the height of your top shelf, with a snug lid and handles.
Space-Saving Tip: Slide the bin in sideways instead of front to back so the label stays visible and you waste no depth behind it.
Pull out anything you have not used since September.
Group it by size so the heavy pieces sit at the bottom of the bin.
Label the bin and lift it to the highest shelf you can safely reach.
2. Park the Slow Cooker Under a Two-Level Shelf Riser
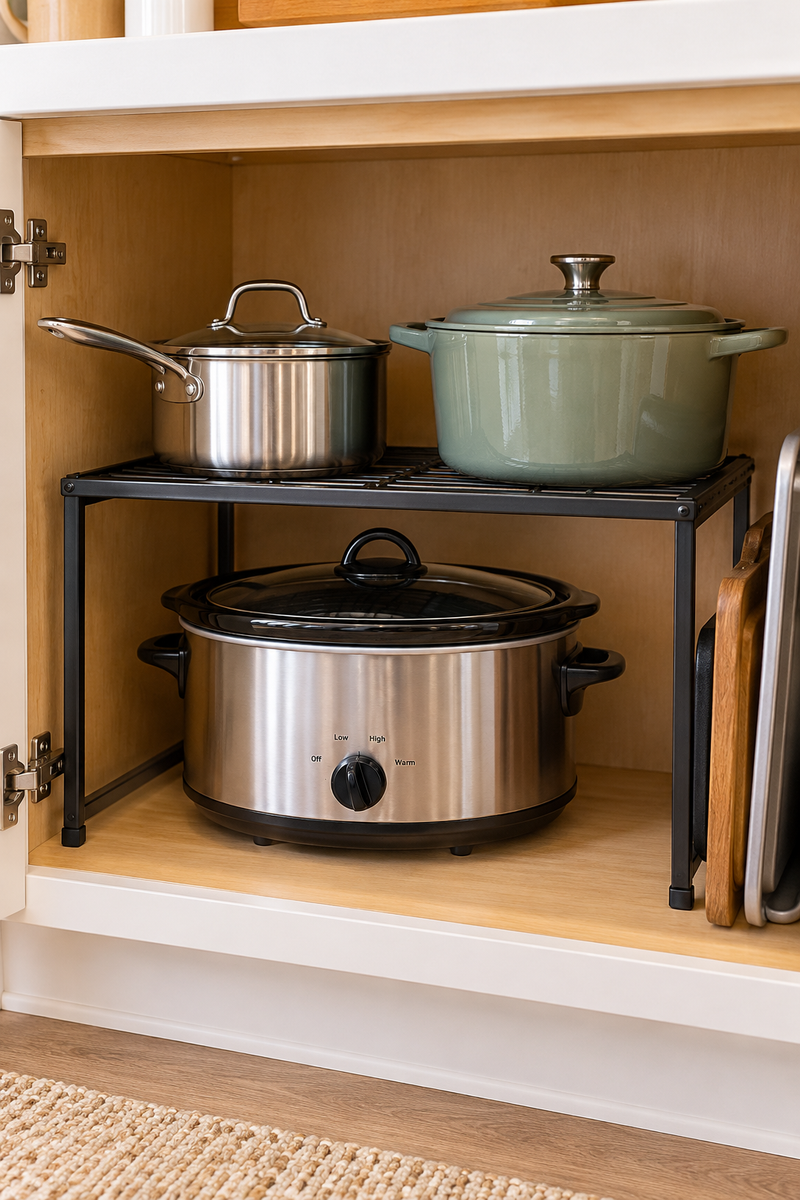
Getting the slow cooker out is easier when it is not buried under pots. A two-level riser gives heavy winter cookware a ground floor and moves lighter pieces to a second level above it.
Keep the insert and lid together so you never hunt for the match. Look for: a sturdy riser with a flat base, a weight rating that suits cast iron, and a width that fits your shelf.
Space-Saving Tip: Coil the cord inside the empty insert so nothing dangles over the shelf edge or catches on a door.
3. Build a Hot Drink Station on One Tray
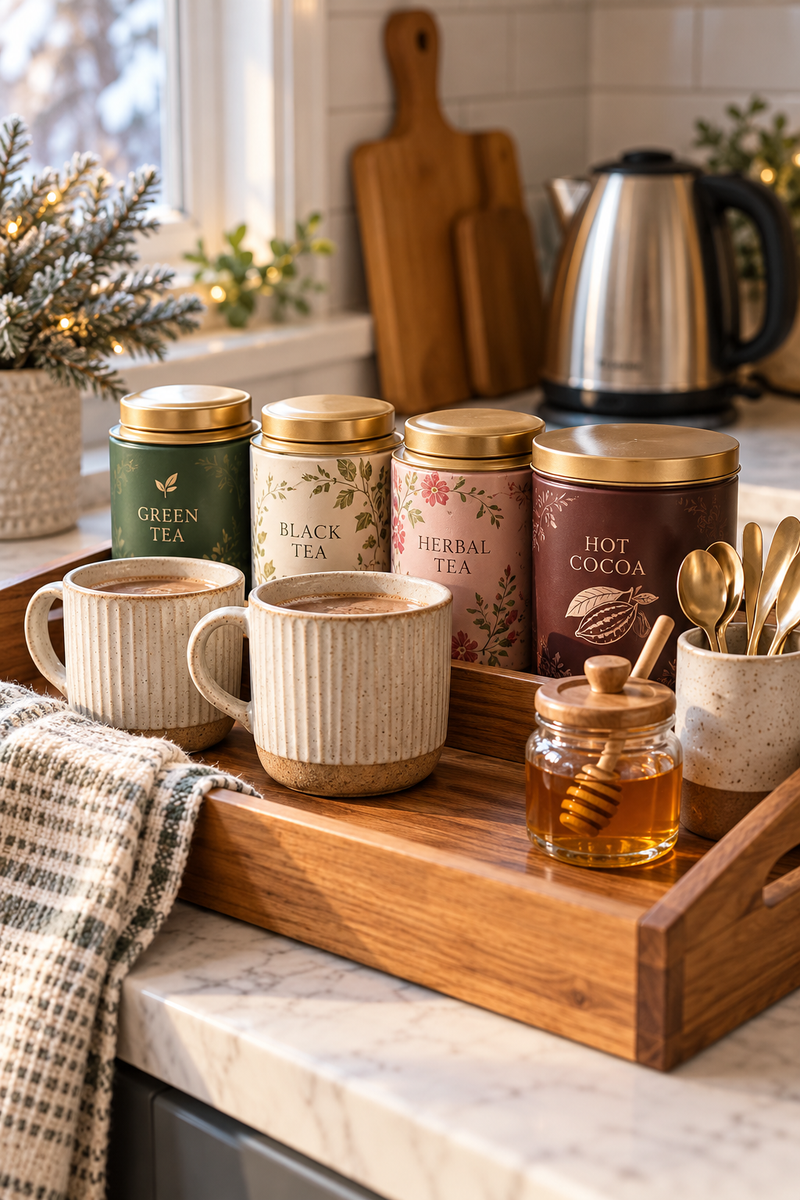
It is 6 a.m., the kettle is on, and the cocoa, tea and mugs live in three different places.
Put the lot on one rimmed tray so the whole station can slide off the counter when you need the space back. If mugs are the bulky part, these ideas for organizing dishes, cups and glasses without cabinets can shrink their footprint. Look for: a rimmed tray with a non-slip base and edges high enough to hold small tins.
Space-Saving Tip: Stand tea tins on their sides in a shallow box on the tray, which cuts the height and lets the tray fit under a shelf.
Station checklist
4. File Baking Sheets and Cooling Racks Upright
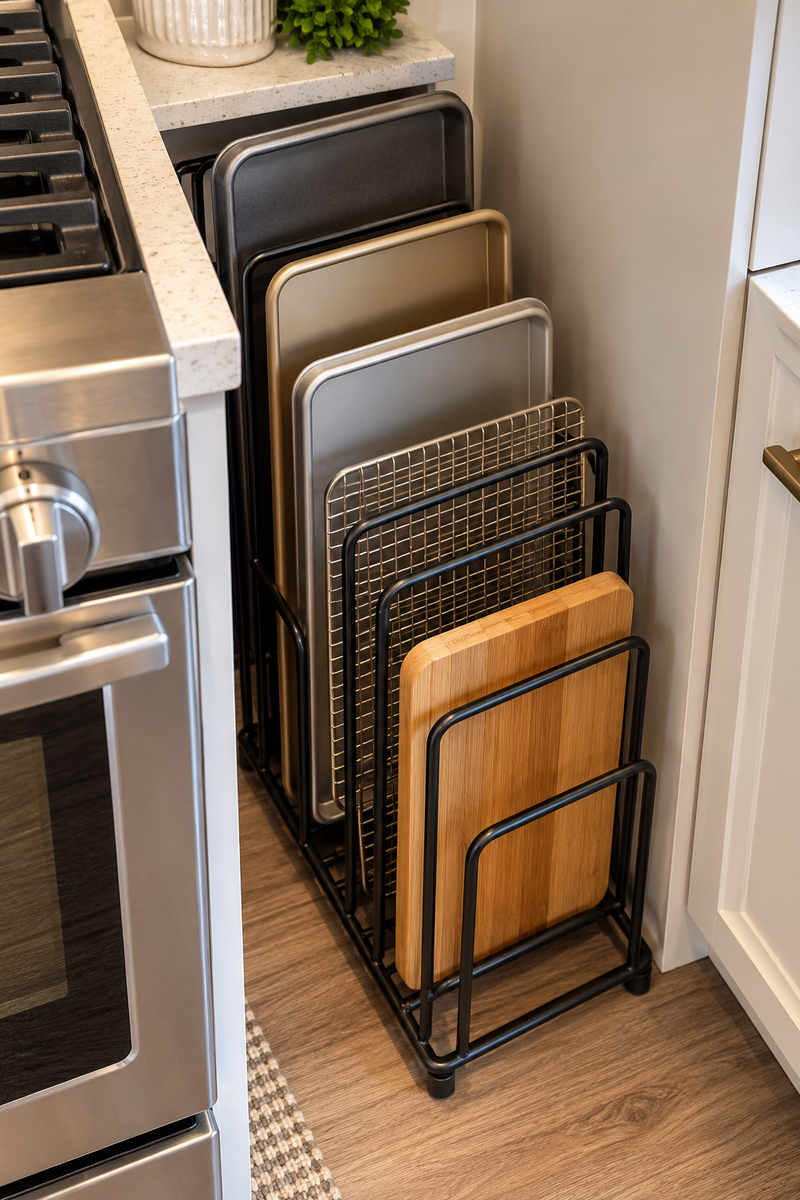
Slide baking sheets on their edges into a vertical file organizer instead of stacking them flat. Racks and cutting boards can share the same slots.
Winter baking tends to bring out three or four pans at once, so being able to pull one without lifting the rest matters. Look for: a file style organizer with wide slots and a steady base.
Space-Saving Tip: Set the organizer in the narrow gap beside the stove or on a cabinet floor, a spot too slim for almost anything else.
Store pans on their edges.
Match the slot width to the thickest pan.
Stacking pans flat under heavy pots.
Wedging them behind the pot shelf where you cannot see them.
5. Nest Soup Containers by Shape and Keep Lids in a Narrow Bin
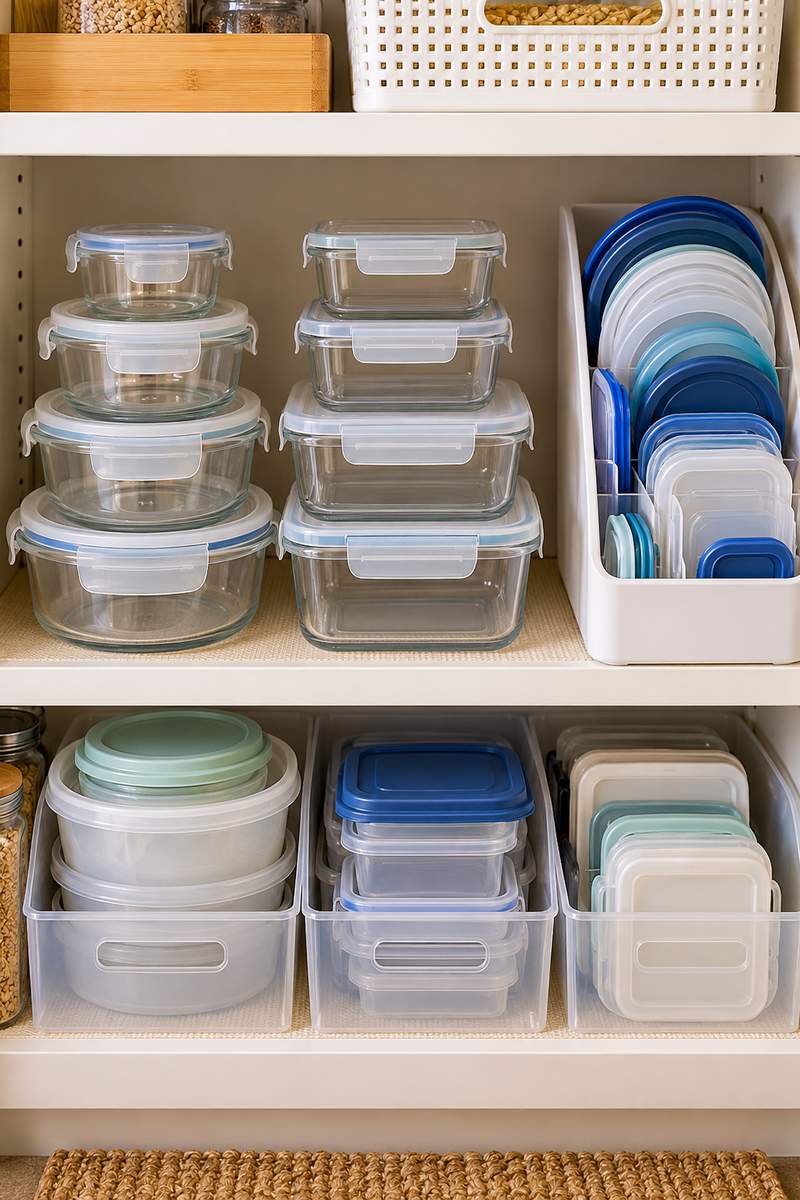
Matching sets are not the secret to tidy leftovers. Shape is.
Round containers nest, square ones stack, and mixing them is what causes the avalanche. Pick one shape per size family, then drop every lid into a slim bin that stands on its side. Look for: a lid bin narrow enough for a shelf edge, and containers that share lid sizes.
Space-Saving Tip: Give the lid bin the front of a low shelf and the containers the space behind it, so lids never wander off.
⚠️ Watch Out
Stackable containers stop saving space once you own more than the shelf can hold. Set a limit based on the shelf, and let go of any piece that has lost its lid.
6. Hang Oven Mitts, Foil and Wraps on an Over-Door Rack
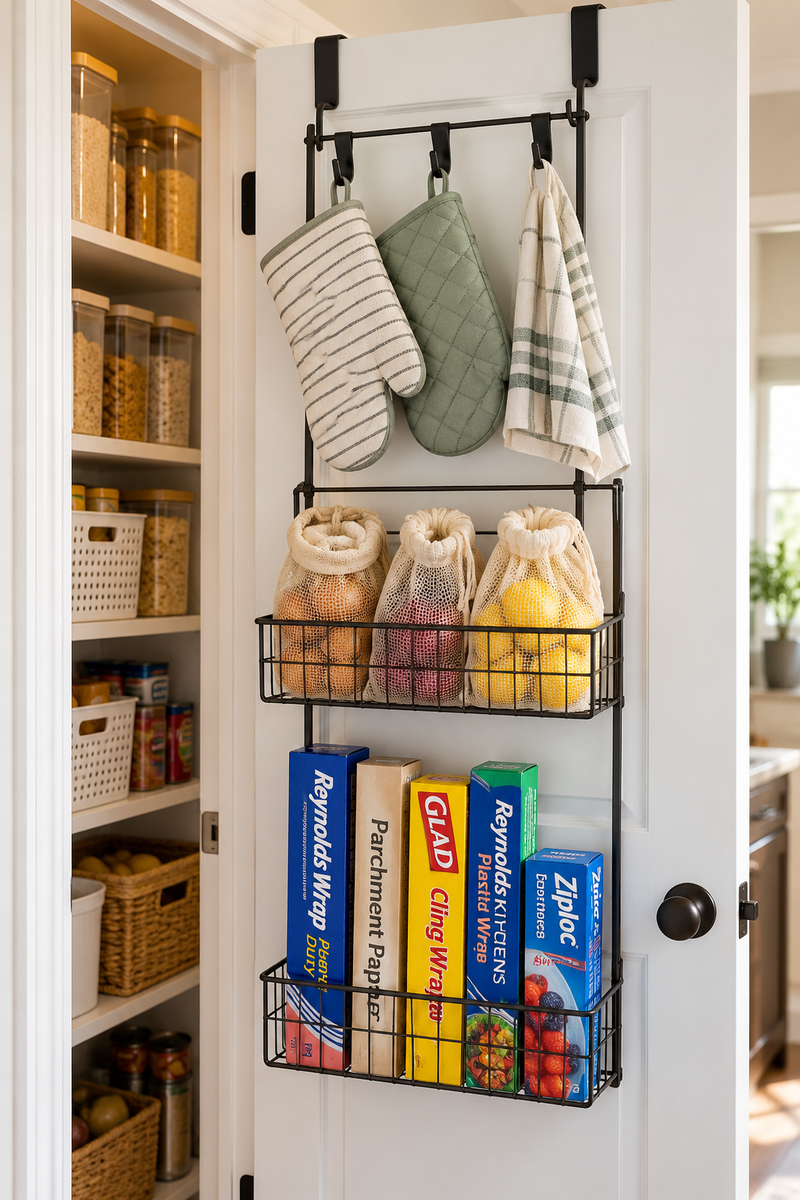
A narrow rack on the back of a pantry or kitchen door can hold oven mitts, foil, wraps and bags in plain sight.
Check your lease and the rack’s weight limit before you hang anything, and confirm the door still closes properly with the rack on. Renters will find more door and wall options in these renter friendly storage ideas that protect a security deposit. Look for: a rack with padded hooks, a clear weight limit and a slim profile.
Space-Saving Tip: Hang the heaviest rolls on the lowest hook so the rack sits straight and the door swings freely.
7. Raise Canned Soup on a Stepped Riser So Every Label Shows
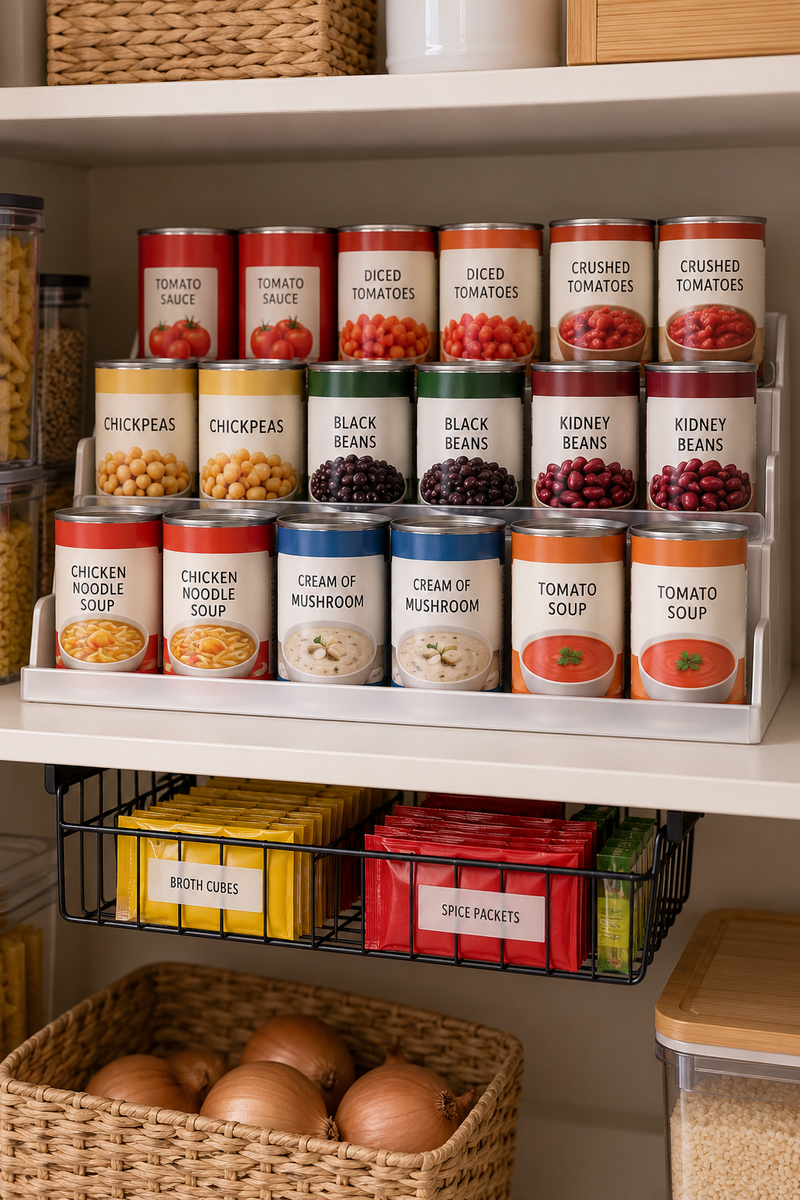
One rule makes cans easier: if you cannot see the label, you will buy another one.
A stepped riser lifts each row a little higher than the one in front, which turns a dark shelf into something you can read at a glance. Jars and tins can share the same steps. Look for: a stepped riser with a front lip and enough width for your most common can size.
Space-Saving Tip: Clip a small under-shelf basket beneath the same shelf and let broth cubes and spice packets live there instead of taking a step.
- ▸Soups and broths on the lowest, closest step
- ▸Beans and chickpeas on the middle step
- ▸Tomatoes and sauces on the back step
- ▸Cans you rarely open on a higher shelf
8. Corral Holiday Baking Supplies in One Lidded Caddy
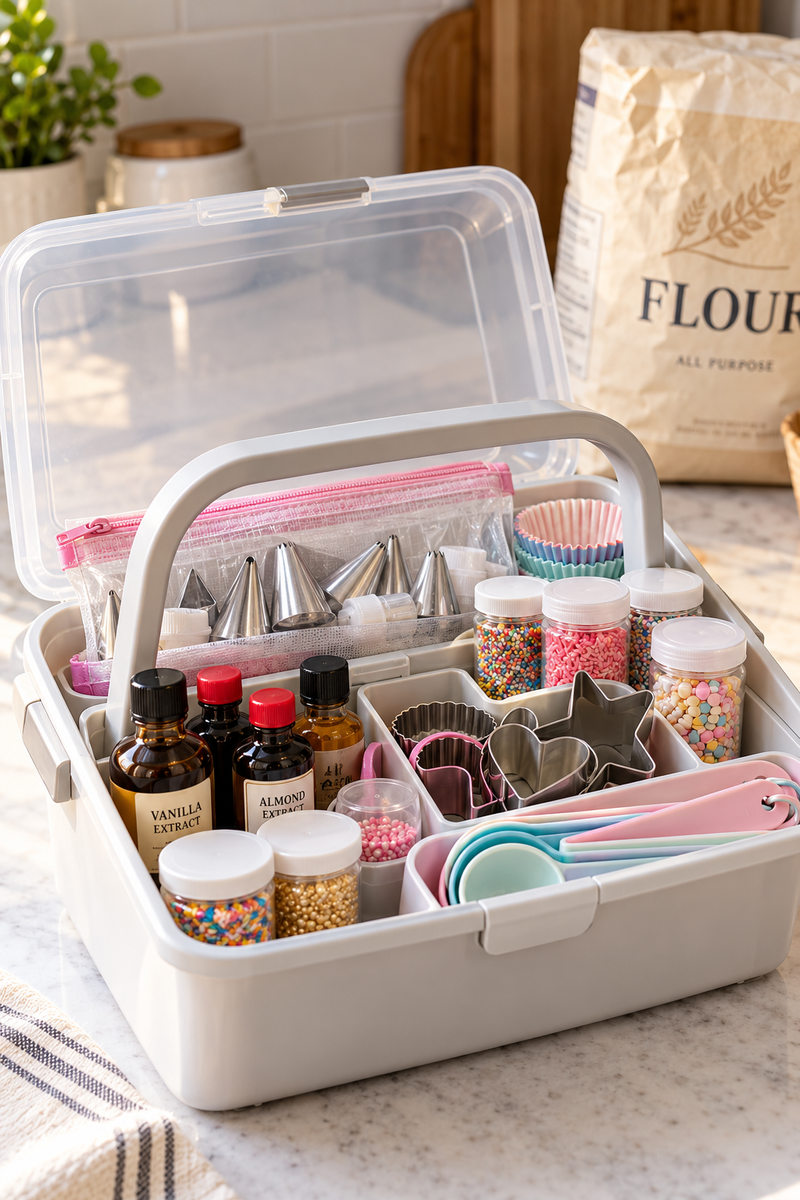
The usual mistake is spreading baking items across three shelves, so every batch starts with a scavenger hunt.
Gather sprinkles, extracts, cutters, piping tips and measuring spoons into one lidded caddy with a handle. Carry it to the counter, bake, and return it to a single shelf. Look for: a caddy with a sturdy handle, a lid that snaps shut and room for tall bottles.
Space-Saving Tip: Keep the bottles standing and lay the flat tools in a zip pouch across the top so the caddy stays shallow.
Sprinkles by the sink, extract above the fridge, cutters in a drawer. Every bake starts with a search.
One caddy on one shelf. Everything comes out together and goes back together.
Quick Comparison Table: Ideas 1 to 8
| Idea | Space Needed | Cost Level | Best Use |
|---|---|---|---|
| 1) Lidded seasonal bin | One high shelf | Low | Summer-only gear |
| 2) Two-level shelf riser | One lower shelf | Low to medium | Slow cooker and heavy pots |
| 3) Hot drink tray | Small shelf or counter edge | Low | Mugs, tea and cocoa |
| 4) Vertical file organizer | Narrow cabinet gap | Low | Baking sheets and racks |
| 5) Container and lid bin | One low shelf | Low | Soup and leftovers |
| 6) Over-door rack | Back of a door | Low | Mitts, foil and wraps |
| 7) Stepped can riser | One shelf | Low | Canned soups and jars |
| 8) Baking caddy | One shelf | Low | Seasonal baking supplies |
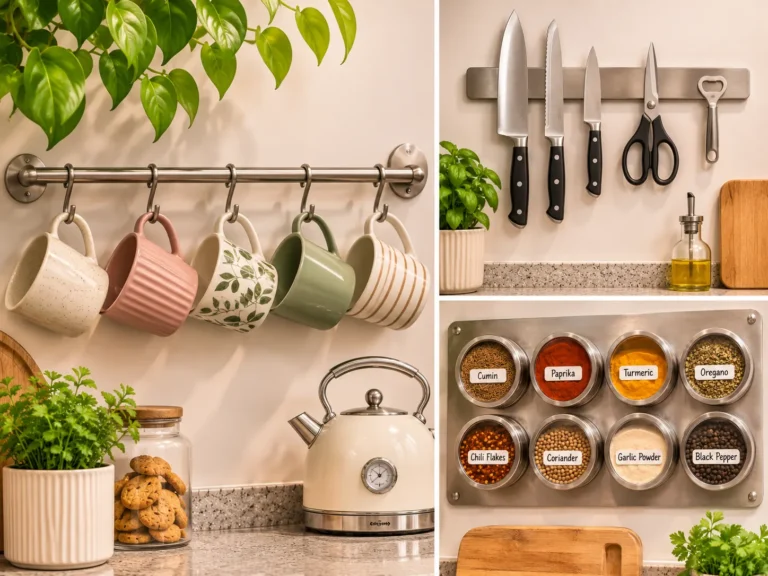
9. Move Everyday Spices to Magnetic Tins on the Fridge Side

Magnetic tins or a tiered shelf? Magnets keep spices in sight on the side of the fridge, while a tiered shelf hides them inside a cabinet.
Pick magnets when cabinets are full and the fridge side is clear. Test a magnet on the surface first, since some finishes are not magnetic. Look for: tins with strong magnets, clear lids and a flat back that sits flush.
Space-Saving Tip: Put the spices you reach for every night at eye level and the baking ones lower, so winter favorites are easiest to grab.
Before you stick anything on
10. Give Winter Root Vegetables a Ventilated Basket in a Cool Corner
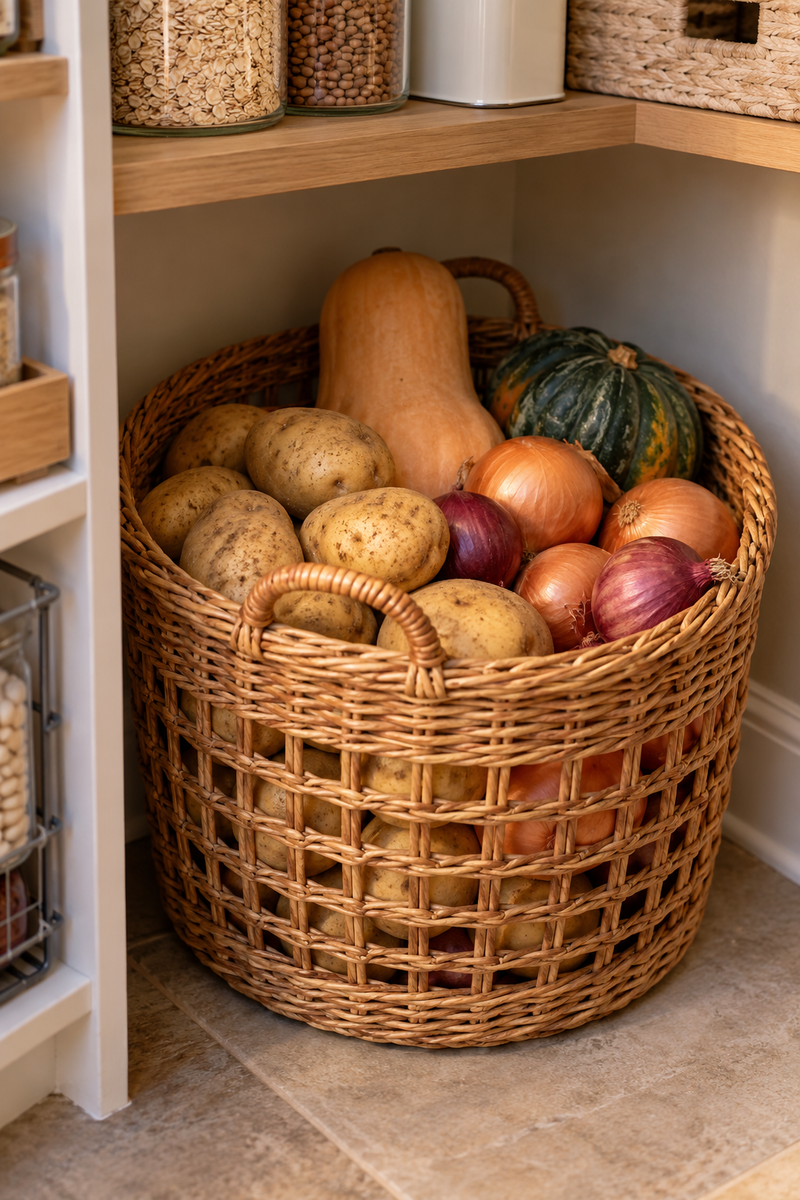
Potatoes, onions and squash tend to arrive in bulk once the weather turns, and they end up in a bag on the floor.
A ventilated basket or crate gives them one clear home in a low corner of the kitchen or a pantry shelf, out of direct sun. Look for: a basket with open sides, a sturdy base and a size that slides under a shelf.
Space-Saving Tip: Choose a basket with a handle and stand it on the floor under a table or low shelf, where the height is otherwise wasted.
Give bulk groceries one named spot, and the rest of the kitchen stops absorbing the overflow.
11. Slide a Slim Rolling Cart Into the Gap Beside the Fridge
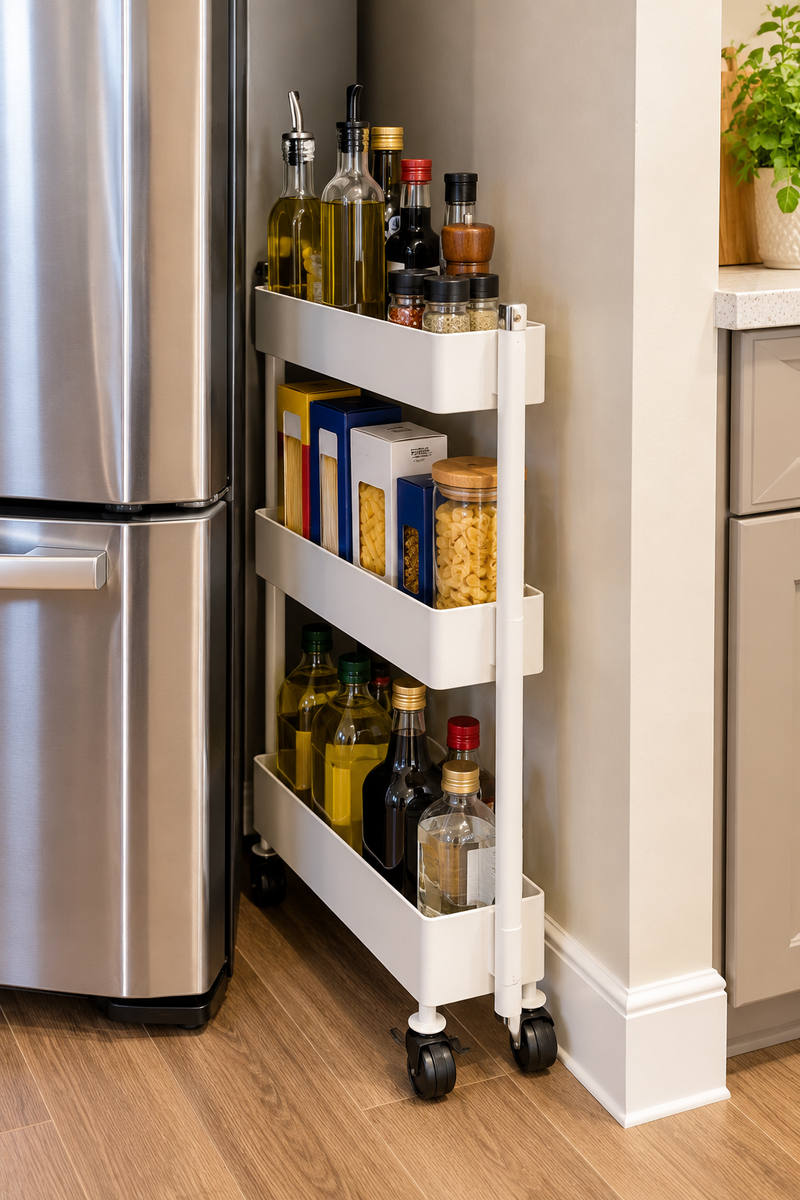
That gap beside the fridge or stove is often the largest unused space in a small kitchen. A slim rolling cart turns it into a pantry for oils, bottles and boxed goods.
Roll it out when you cook, tuck it back when you eat. Look for: a cart with locking wheels, shelves deep enough for your largest bottle and a width that clears the appliance by a little.
Space-Saving Tip: Keep bulky bottles on the bottom shelf and the top for light boxes, and check the cart’s weight limit before you load it.
📌 Good To Know
Measure the gap width and the floor to handle height before you shop. Many gaps are narrower than they look, and a cart that rubs the appliance is hard to use.
12. Zone the One Good Drawer With Adjustable Dividers

The only real drawer in a small kitchen usually becomes the junk drawer by December.
Adjustable dividers give it zones before it fills up, so the ladle never lands on top of the whisk. Look for: dividers that expand to fit the drawer width and have a non-slip grip.
Space-Saving Tip: Lay long tools flat at the back and keep short ones at the front, so the drawer closes without a fight.
13. Hang Pot Lids on the Back of a Cabinet Door
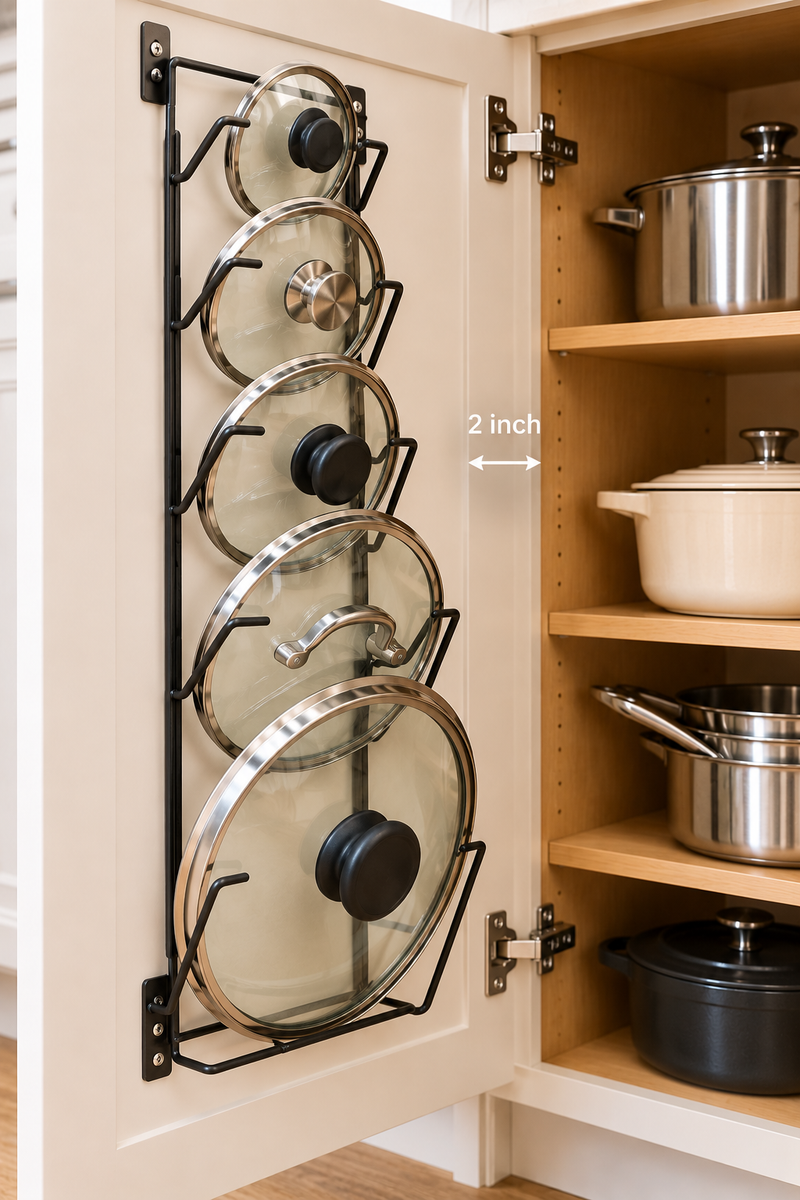
A simple rule keeps lids under control: store them where the pots will not touch them.
Lids slide around in a stacked cabinet, so give them a rail or a slim rack on the inside of a cabinet or pantry door. Read your lease first and check the rack’s weight limit, especially on adhesive types. Look for: an adjustable rack or rail that fits several lid sizes and holds them upright.
Space-Saving Tip: Use the door closest to the stove so every lid is one step away when a pot starts to simmer.
- ▸Largest lids on the lowest rung so they hang clear of the door edge
- ▸Glass lids toward the middle where they lift out easily
- ▸Smallest lids at the top, closest to eye level
- ▸One empty spot left for the pot you buy next winter
14. Clip Under-Shelf Baskets Beneath a Shelf for Bread and Bags
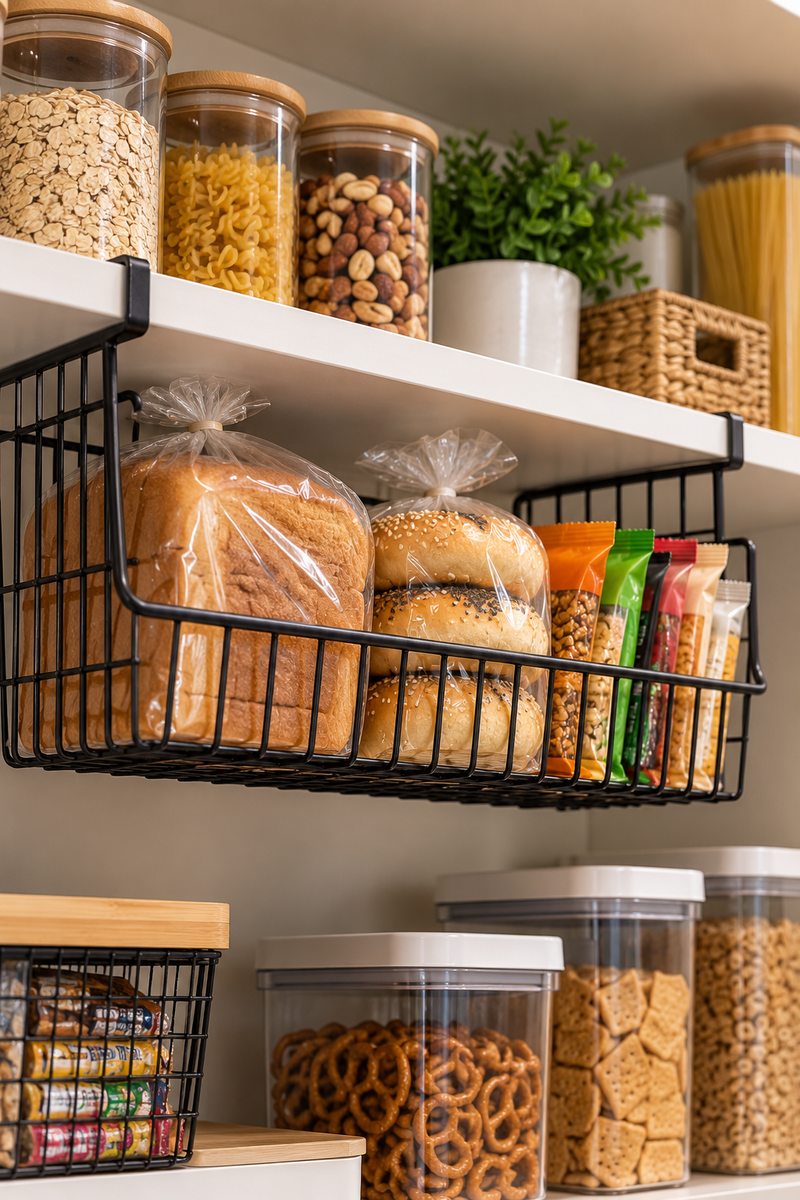
Under every shelf there is wasted height. An under-shelf basket catches bread, bagels, produce bags and snack packs that normally crowd the shelf below.
Check its weight limit before loading it. Look for: a basket that hooks over the shelf edge without screws and fits your shelf thickness.
Space-Saving Tip: Use the basket nearest the toaster for bread and the next one over for snacks, so each grab takes one reach.
15. Label Each Shelf Zone So Everyone Sharing Knows Where Things Go
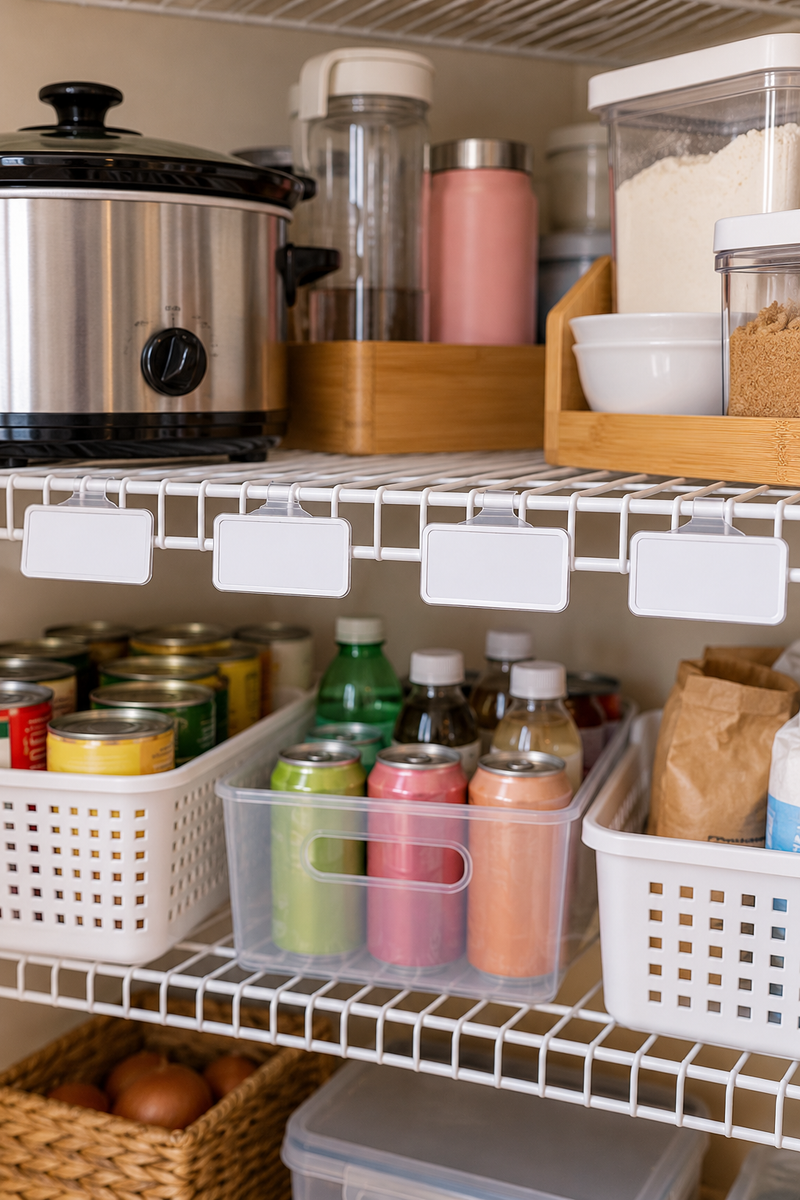
A shared kitchen only stays sorted when everyone knows the system.
Add a small label to the front edge of each shelf, one per zone: cooking, baking, drinks, snacks. Keep the words short and use the same words you say out loud. Look for: labels in a wide, easy to read font with removable adhesive, or small clip-on tags.
Space-Saving Tip: Label the shelf edge rather than each container, so the label stays put when the contents change and you save the space.
Zone label ideas for winter
Quick Comparison Table: Ideas 9 to 15
| Idea | Space Needed | Cost Level | Best Use |
|---|---|---|---|
| 9) Magnetic spice tins | Side of the fridge | Low to medium | Everyday spices |
| 10) Ventilated basket | Floor corner | Low | Potatoes, onions and squash |
| 11) Slim rolling cart | Gap beside the fridge | Medium | Oils, bottles and boxed goods |
| 12) Drawer dividers | One drawer | Low | Everyday utensils |
| 13) Door lid rack | Inside a cabinet door | Low | Pot lids |
| 14) Under-shelf baskets | Space below a shelf | Low | Bread and bags |
| 15) Shelf labels | Shelf edges | Low | Shared kitchens |
Short Q&A
What should I do first in a winter kitchen reset?
Start with idea 1. Moving off-season gear out frees reachable space, and every other idea gets easier once there is room to work.
Which of these ideas work without drilling?
Most of them, since they sit on shelves or floors, hook over edges or use magnets. Over-door racks and adhesive rails still call for a lease check and a look at the product’s weight limit.
How do I keep the kitchen sorted when I share it?
Use idea 15. Short labels on each shelf edge mean nobody has to guess where the slow cooker or the baking caddy lives.
What if I have almost no free shelf?
Look at the spaces that sit empty: the fridge side, the gap beside the fridge, the back of a door and the underside of a shelf. Ideas 6, 9, 11, 13 and 14 all use them.
Your Winter Kitchen, Sorted
Winter does not make your kitchen any bigger, but it does ask more of it. The ideas above work by giving every cold weather item a clear, specific home, using walls, doors, gaps and corners that were sitting empty.
That is what winter kitchen organization small kitchen planning really comes down to: small moves repeated, not big purchases. Start with the one or two ideas that match your biggest frustration, then add the rest as the season goes on.
Save this list for the next time your space needs sorting.
One Comment